Documentation for Berliner – Legacy
- About Berliner
- WordPress theme installation
- Image Sizes
- Useful Plugins
- Importing Sample Content using One Click Import
- Setting up your theme
- 1) Creating theme pages
- 2) Populating your blog
- 3) Adding Events
- 4) Adding Discography items
- 5) Adding Slider items
- 6) Adding Videos
- 7) Adding Galleries
- 8) Adding Artists
- 9) Creating your menu
- 10) Adding Hero images in Pages
- 11) Changing Colors
- 12) Setup the Homepage player
- 13) Adding content to your Homepage
- 14) Changing Footer text
- 15) Section Titles
- 16) Custom Widgets
- The CSSIgniter settings panel
- How to use the page builder template
- Additional Information
- Next Steps
About Berliner
Berliner is a WordPress theme designed for musicians and record labels . It allows you to display your content mainly by using the six custom post types provided, “Slides”, “Events”, “Discography”, “Videos” “Galleries” and “Artists”. The above act as standard WordPress posts or pages but each of them has specific functionality which differentiate them from the former. The homepage is comprised of custom widgets specially crafted to bring those custom post types together as discussed later on in the documentation.
WordPress theme installation
The easiest way to install the theme, is by accessing your WordPress admin panel, then go to Appearance > Themes. Select the Install Themes tab and click the Upload link located just below the tab’s name. Click on Browse… and select the WordPress theme zip file you just downloaded. Then click the Install Now button, and after a few seconds, your new theme should be installed. Click activate and the theme is ready to use.
In order to install the theme manually, or in case you have trouble installing it through the admin panel, you have to unzip the WordPress theme’s zip file on your computer, and upload via FTP the resulting theme folder into your WordPress installation themes folder (wp-content/themes). Then, from the WordPress admin go to Appearance > Themes. The theme should be available in your themes list. Click activate.
After activation, you will be redirected to the CSSIgniter Settings panel (accessible from Appearance > CSSIgniter Settings) to start customizing your brand new theme.
Image Sizes
The recommended image sizes for the Beaute theme are:
- Homepage slider: 1920x600px
- Discography & Gallery images : 700x700px
- Page header image: 1920x250px
- Video thumbnails: 700x450px
- Event thumbnails: 700px in width, not restricted in height
Useful Plugins
These plugins provide functionality and features used directly (or not) by the Theme. So, it is recommended to install and activate them before importing your sample content.
- CSSIgniter Shortcodes you can use our custom made shortcode plugin to help you create a variety of layouts and elements on your site. Instructions can be found here.
- Socials Ignited use this plugin to create a widget that links to all your social profiles. You can also customize it with your icons and add new social networks, a guide can be found here.
- Contact Form 7 use this plugin to create a contact form, then copy the shortcode it gives you and paste it in an empty page.
Importing Sample Content using One Click Import
To automate the process of importing and for a better experience we have natively included support for OneClick Import Plugin. Let install it fist:
From your WordPress dashboard
- Visit ‘Plugins > Add New’,
- Search for ‘One Click Demo Import’ and install the plugin,
- Activate ‘One Click Demo Import’ from your Plugins page.
From WordPress.org
- Download ‘One Click Demo Import’.
- Upload the ‘one-click-demo-import’ directory to your ‘/wp-content/plugins/’ directory, using your favorite method (ftp, sftp, scp, etc…)
- Activate ‘One Click Demo Import’ from your Plugins page.
Once the plugin is activated you will find the actual import page in: Appearance > Import Demo Data.
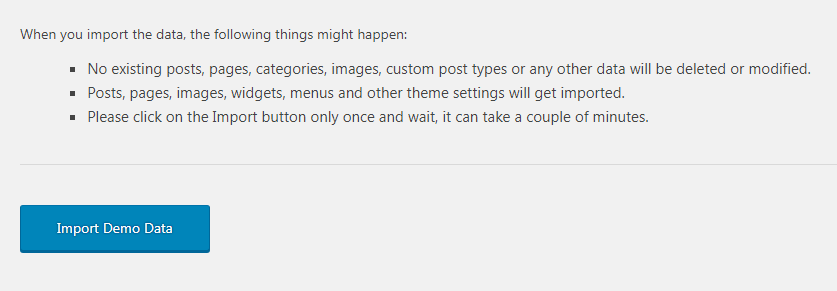
Click on the Import demo data button and you are done!
This plugin requires PHP version of at least 5.3.x, but we recommend version 5.6.x or better yet 7.x. Please contact your hosting company and ask them to update the PHP version for your site.
Setting up your theme
1) Creating theme pages
Let’s start by adding pages you are going to need. Go to Pages > Add New and create the following pages:
- “Home” this will serve as your homepage, assign to it one of the three available “Homepage” templates from the “Page attributes” panel.
- “Blog” this will be your posts page. Just create it, no further action needed.
- “Events Listing” this page will list your events, apply the “Events Listing” template. You can disable the map if you so desire by going to CSSIgniter settings > Display Options and uncheck the designated box (2nd to last).
- “Discography Listing” this page will list your albums, apply the “Discography Listing” template.
- “Video Listing” this page will list your videos, apply the “Video Listing” template.
- “Galleries Listing”, here you can list your galleries, apply the “Galleries Listing” template.
- “Artists Listing”, here you can list your galleries, apply the “Artists Listing” template.
(TIP, all page titles serve as examples, you can name your pages according to your needs.)
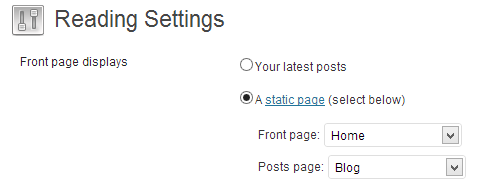
Once the pages are created, navigate to Settings > Reading and set the “Home” page to be your static frontpage and the “Blog” page as your posts page, as demonstrated in the image below.
2) Populating your blog
To add new posts to your blog, go to Posts > Add New, title your post, enter the content in the editor, upload a featured image by clicking “Set featured image” on the Featured Image panel, add a category and/or tag to the post, if you so desire, from the respective panels and publish the post by clicking “Publish”.
3) Adding Events
To create a new event go to Events > New Event. Add a title, any text necessary and upload a featured image, then move to the Events Settings panel. In the Event Details section you can enter the event’s venue, location, date, start and finish time. In the Event Map below you can input the event’s location. Once done, publish the event.
4) Adding Discography items
To create a new discography item go to Discography > Add New, set the album’s name as a title, enter relevant information in the content editor, set a featured image and move to the Discography Settings panel below. Here you can fill in relevant album details, purchase details and finally add tracks to the item’s tracklisting. See the additional info section for more about the tracklisting.
5) Adding Slider items
To add items to your frontpage’s slider go to Slider Items > Add New, set a title for the slider item and upload a featured image (which will be the image displayed on the frontpage), in the Slider Settings panel you can set a URL to which your visitors will be redirected when the slider’s button is clicked, a subtitle for the slider and an icon which will appear above the button. When finished publish the slider item. You can select the number of slides on the slider or disable it entirely, if you so desire, under CSSIgniter settings > Homepage options.
6) Adding Videos
To add a new video go to Videos > Add New. Add a title, any text necessary and upload a featured image (if your video comes from YouTube the theme will pull the thumbnail automatically, you do not have to set a featured image), then move to the Video Settings panel. Fill in the location where the video was shot and add a URL to the video, if it is a self-hosted video check the corresponding box and publish the video.
7) Adding Galleries
To create a new gallery item go to Galleries > Add New, set the gallery’s name as a title, enter some text if you wish in the content editor, set a featured image and proceed to upload your images by clicking the “Add Images” button in the “Gallery Details” panel (please read the “Creating Galleries” section below, first) and finally publish the gallery item. Single gallery column numbers can be controlled in CSSIgniter settings > Gallery options.
8) Adding Artists
To add an artist go to Artists > Add New. Add the artist’s name as a title, any text necessary and upload a featured image, then publish the item.
9) Creating your menu
Now that your content is in place, you will need a menu. Go to Appearance > Menus, check the pages you want on your menu and add them, give your menu a name and save it. Finally you will need to set your menu as “Main” menu, this can be done either by checking the “Main menu” box in “Menu Settings” just below your menu items in Menu Structure, or by going to the “Manage Locations” tab and selecting the menu you just created.
(TIP, for more info on creating and managing menus, please read the WordPress Menu User Guide here)
10) Adding Hero images in Pages
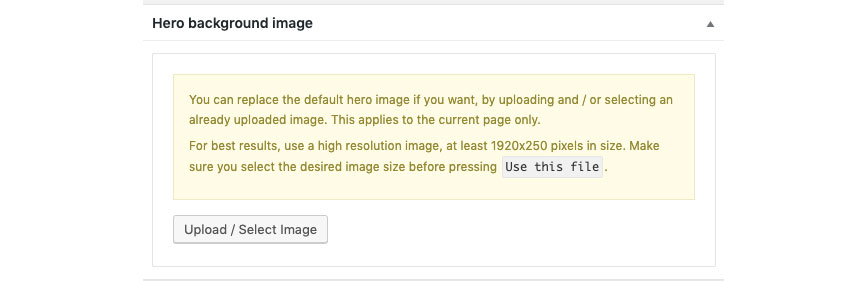
You can apply a different hero image in specific pages. This will apply in all pages but not in the Blog or Shop, which the image is controlled from Customize→Theme Colors→Hero.
11) Changing Colors
You can easily change all basic theme colors from Customize→Theme Colors section creating your own visual theme. Here you can select colors for both your Header Hero and Global Colors.
For your Global section you can easily
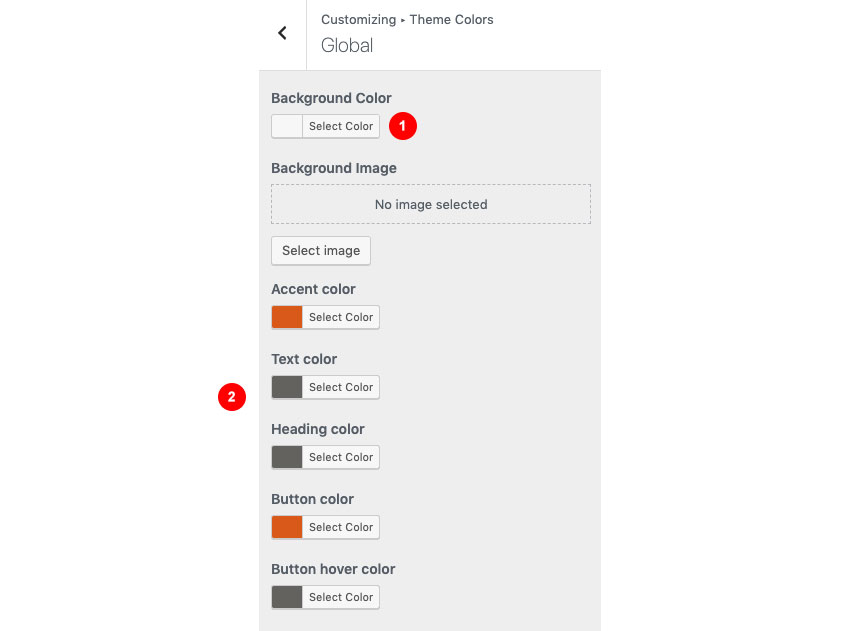
- Add a background color and a background image that will apply everywhere
- Select your main pallete, for links, buttons etc
While in the header and menu section you can

- Select a header background color
- Change your menu styles
In this Hero section you can

- Select a background color for your hero
- Upload a generic hero image. This image is the default for your blog page and any page you dont have a specific one from the Page hero options.
12) Setup the Homepage player
Berliner provides a native player under the home slider. In order this player to appear you will need to have selected under CSSIgniter Settings→Audio Options a valid discrography item with audio files which will serve as the source of your music. You can also select a Shoutcast v2.0 + stream also.
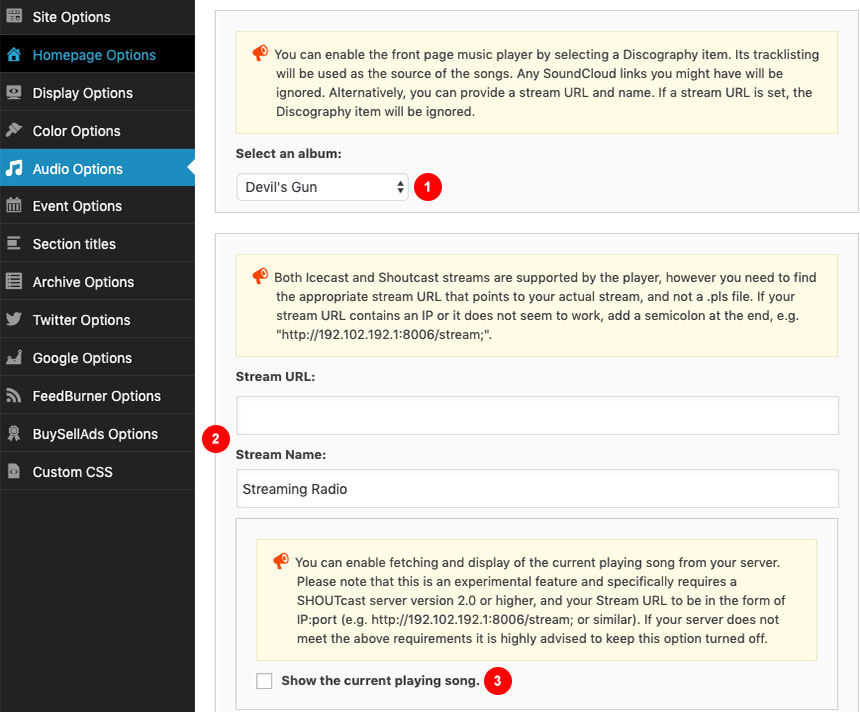
- Select a discography item
- Select a Shoutcast stream
- Fetch automatically your playing song from the stream
13) Adding content to your Homepage
The homepage on Berliner consists of three widgetized areas which feature all the content unique to the homepage. You can access these areas and add content to them in Appearance > Widgets. Add any widgets you like in any of the “Homepage Sidebar #” areas to shape the Homepage to your liking.
You cannot edit the Homepage directly with any page builder. Instead you will need to use the page builder template included in the theme to create your landing page.
Duplicate the demo’s layout
On the demo’s homepage we have four slider items, six CI Item widgets, with an event selected on each, on the Homepage Sidebar #1. Following are the default 5 recent posts displayed (this number can be changed or posts can be replaced with the content of a page from CSSIgniter settings > Homepage options). We then have four CI Item widgets on Homepage Sidebar #2 displaying a gallery, an event, an album and a video. Finally on Homepage Sidebar #3 we have theCI Album Tracklisting, two CI Recent Items set to display 2 albums and 3 videos and finally the CI Top Tracks widget. On the Footer Sidebar 1 we have a text widget, the Footer Sidebar 2 is blank, on the Footer Sidebar 3 we have the CI About Me widget and finally in the Footer Sidebar 4 the CI Socials Ignited and a search widget.
14) Changing Footer text
The theme’s footer features an area for you to enter your copyright info, privacy policy etc. To change the text you need to go to CSSIgniter settings > Site options (4th box down). Primary footer text appears on the left side of the footer and secondary on the right.
15) Section Titles
Each listing page has a section title, these by default follow the naming of the custom post types, but you can change them to match your needs under CSSIgniter settings > Section Titles.
16) Custom Widgets
The theme features ten custom widgets, displayed below, which can help a lot when setting up your homepage.
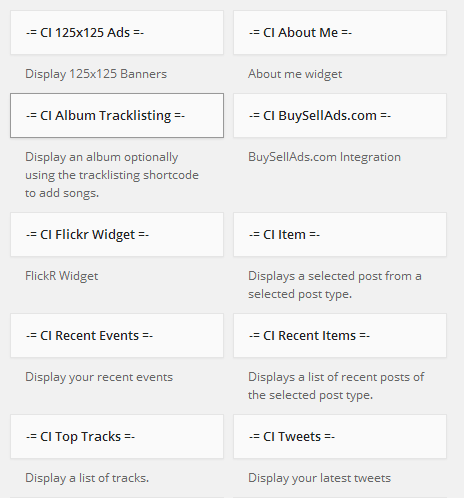
All widgets can be accessed from Appearance > Widgets. Below each widget you will find a small description explaining their functionality.
The CSSIgniter settings panel
Last but not least, under Appearance > CSSIgniter settings, you can find our custom built settings panel. From here you can manipulate various aspects of your theme, including, but not limited to, changing your logo, setting a custom background, changing color scheme and applying custom styles via the custom CSS tab. All options feature a description so you instantly know their provided functionality.
How to use the page builder template
The theme comes bundled with a page builder template which allows you to use your favorite page builder plugin on it and create unique layouts very easily.
To use that template start by going to Pages > Add New. This will create a new page. Add a title to your page and select the Page builder template from the template drop down in the Page Attributes metabox.
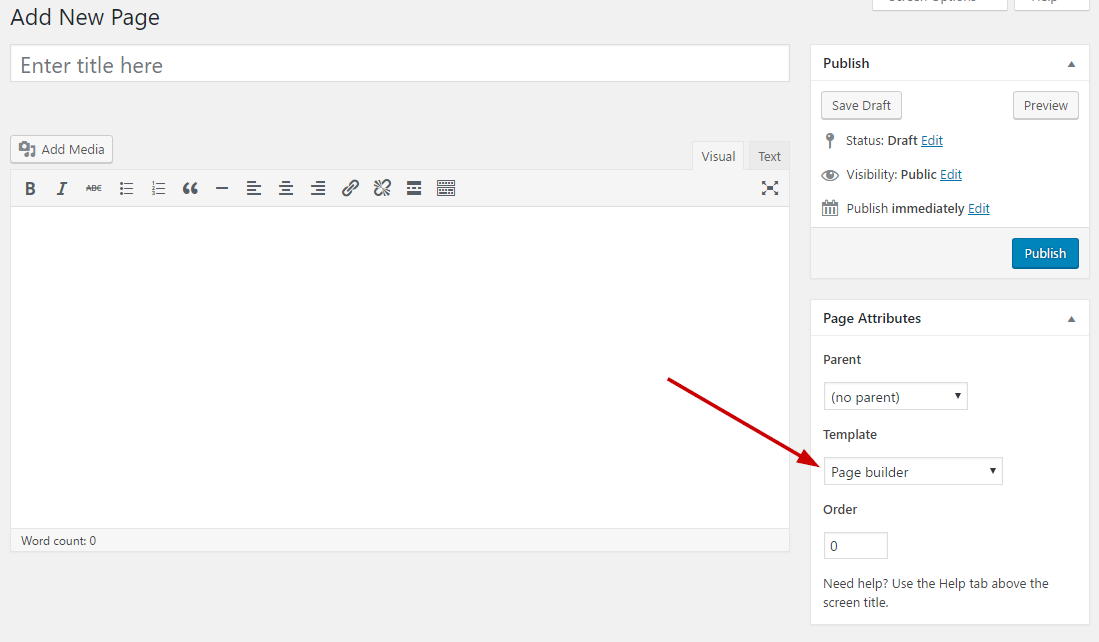
That’s it. You can now start building your page using the page builder of your choice, once done publish it and check it out.
Additional Information
Creating Galleries
To create a gallery using our gallery management system follow these steps:
On the “Gallery Information” panel click the Add Images button.

To upload your images, drag & drop them in the Edit Gallery window which will pop-up, or select Add to Gallery in order to select already uploaded ones. Once you are done, click the Update Gallery button on the lower right.
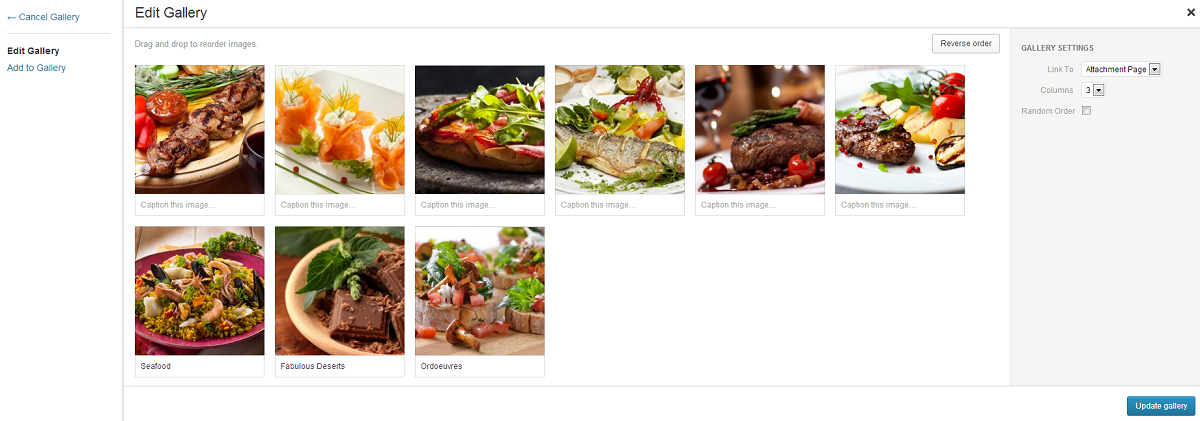
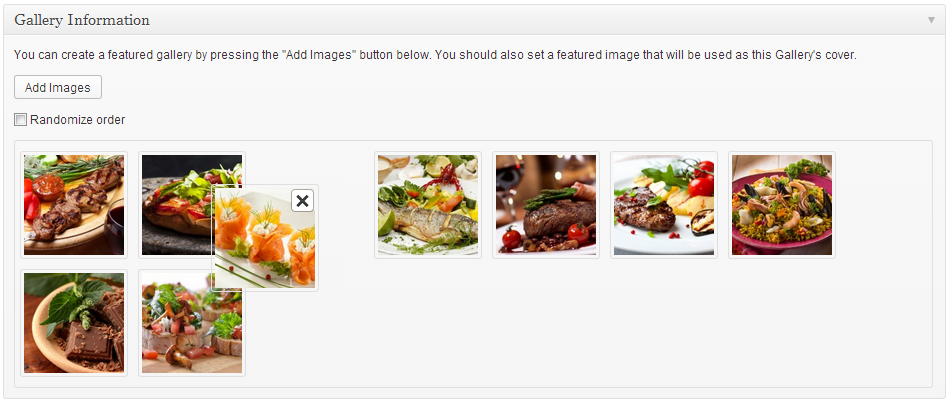
Your “Gallery Information” panel will look like this

You can re-arrange the order of images by drag & drop.
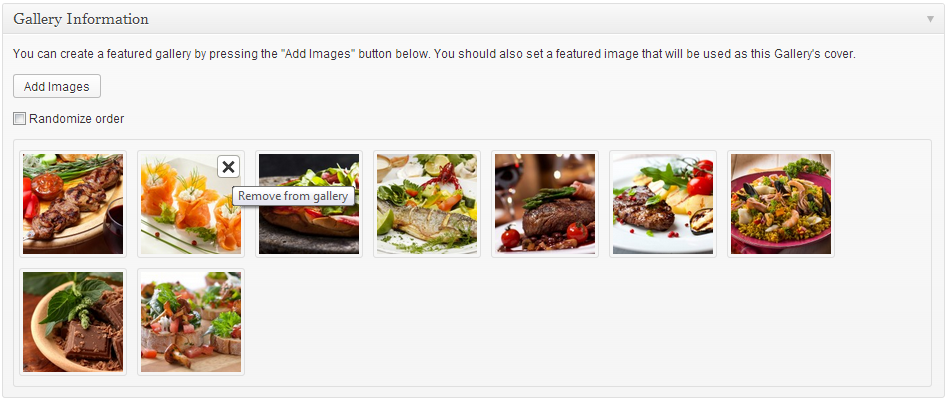
If you wish to remove an image from the gallery, hover your mouse over it and click the X as shown below.
By checking the Randomize order box your gallery images will appear in random order which will change on every page refresh.
When done, publish the gallery item.
If you need to add images after the gallery’s creation just follow the same procedure.
Tracklisting
Each discography item, can have multiple tracks assigned to it. Tracks can be registered through the Tracks Details section, within the Discography Settings section.
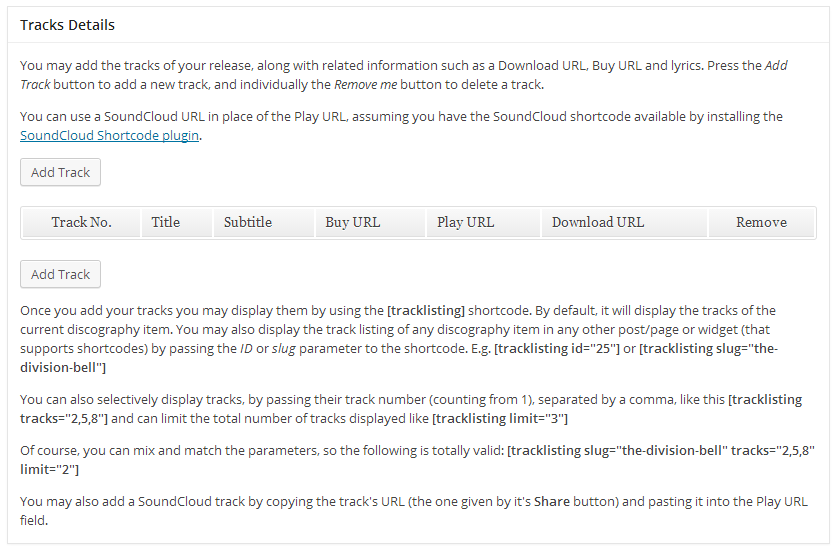
To add a new track, press the Add Track button. This will add a new empty line for you to fill. First, add a title and optionally a subtitle.
If the track can be purchased online, enter the URL inside the Buy URL field.
You can provide a preview (or even the full song) for your visitors to listen to, by entering the URL of the MP3 file inside the Play URL field. You can upload and/or select an already uploaded song through the WordPress Media Manager, by pressing the button located inside the field.
You may allow your users to download the track, by entering the song’s URL inside the Download URL field. Please note that for locally hosted MP3s, the theme tries to force the visitor’s browser to download the file. If the file is on another server, whether it will be downloaded or just opened, is a matter of configuration of the remote server and not the theme’s issue.
You can also add the lyrics for each track, in the big Song Lyrics field.
Tracks can be re-arranged by dragging and dropping them in the appropriate order. Track numbers are automatically updated to be in sequence.
In order to remove a track, press the Remove Me button next to the desired track. Please be careful, as there is no confirmation of removal. If you publish/save/update the post, the change is irreversible.
Displaying the track listing
Once you add your tracks you may display them by using the [tracklisting] shortcode in the discography item’s main text box. By default, it will display the tracks of the current discography item, so the simplest usage is this:
[tracklisting]
You may also display the track listing of any discography item, in any other post/page or widget (that supports shortcodes) by passing the ID or slug parameter of the discography to the shortcode. E.g.:
[tracklisting id="25"]
or
[tracklisting slug="the-division-bell"]
You can also selectively display tracks, by passing their track number (counting from 1), separated by a comma, like this:
[tracklisting tracks="2,5,8"]
and can limit the total number of tracks displayed like this:
[tracklisting limit="3"]
Of course, you can mix and match the parameters, so the following is totally valid:
[tracklisting slug="the-division-bell" tracks="2,5,8" limit="2"]
Next Steps
Still have questions or problems setting up your CSSIgniter Theme? We will be happy to help you out! Please visit our support Hub