Documentation for Kea – Legacy
About
Kea is premium Hotel theme
WordPress theme installation
The easiest way to install the theme is by accessing your WordPress admin panel, then go to Appearance > Themes. Select the Install Themes tab and click the Upload link located just below the tab’s name. Click on Browse… and select the WordPress theme zip file you just downloaded. Then click the Install Now button, and after a few seconds, your new theme should be installed. Click activate and the theme is ready to use.
In order to install the theme manually, or in case you have trouble installing it through the admin panel, you have to unzip the WordPress theme’s zip file on your computer and upload via FTP the resulting theme folder into your WordPress installation themes folder (wp-content/themes). Then, from the WordPress admin go to Appearance > Themes. The theme should be available in your themes list. Click activate.
TIP: A more visual guide can be found here.
Image Sizes
The recommended image sizes are:
Post Thumbnail: 850x567px
Media Item: 555x400px
Media Item Tall: 555px in width and unlimited in height
Media Item small: 80x80px
Brand Logo: 80 in height and unlimited in width
Full width: 1140x650px
Hero image: 1920x500px
Slide: 1920x850px
Useful Plugins
These plugins provide functionality and features used directly (or not) by the Theme. So, it is recommended to install and activate them before importing your sample content.
- Kea Specific plugin: You will be asked to auto-install this plugin when installing the site. You can find this under your theme /plugins/ folder.
- One Click Import Use this plugin to help you import your content with just one click.
- MaxSlider Use this plugin to help you create custom sliders and use them anywhere you wish shortcodes.
- Elementor A free page builder that delivers high-end page designs and advanced capabilities.
- Contact Form 7 use this plugin to create a contact form, then copy the shortcode it gives you and paste it in an empty page.
Importing Sample Content using One Click Import
To automate the process of importing and for a better experience we have natively included support for OneClick Import Plugin. Let install it fist:
From your WordPress dashboard
- Visit ‘Plugins > Add New’,
- Search for ‘One Click Demo Import’ and install the plugin,
- Activate ‘One Click Demo Import’ from your Plugins page.
From WordPress.org
- Download ‘One Click Demo Import’.
- Upload the ‘one-click-demo-import’ directory to your ‘/wp-content/plugins/’ directory, using your favorite method (ftp, sftp, scp, etc…)
- Activate ‘One Click Demo Import’ from your Plugins page.
Once the plugin is activated you will find the actual import page in: Appearance > Import Demo Data.
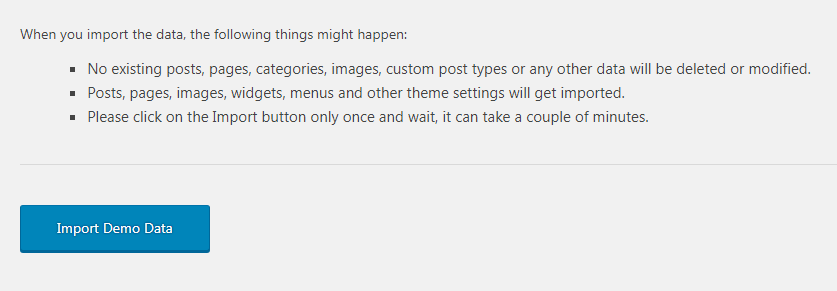
Click on the Import demo data button and you are done!
This plugin requires PHP version of at least 5.3.x, but we recommend version 5.6.x or better yet 7.x. Please contact your hosting company and ask them to update the PHP version for your site.
Theme pages
Let’s start by adding the first few basic pages you are going to need. Go to Pages > Add New and create the following pages:
Frontpage Page
To set up the homepage create a page named Home and set to it the Front page Template from the Page Attributes drop down on the right. To add content to your front page go to Customize > Widgets or Appearance > Widgets and use the theme’s widgets to help you display your content. You will notice that in your Frontpage template page under the WordPress text Editor you have a Frontpage Options section.
Hero Section
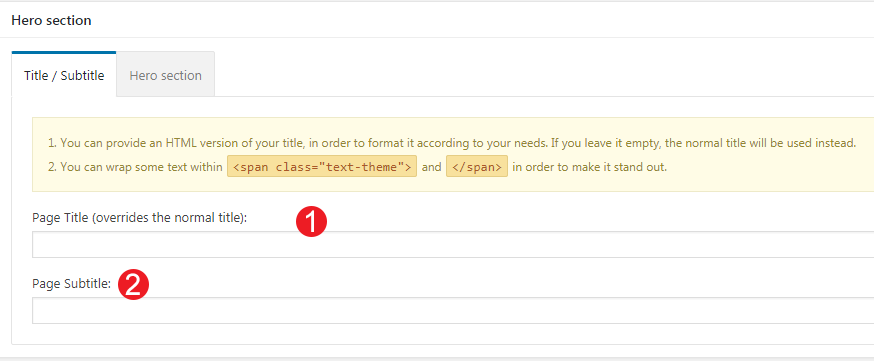
This the basic section before the contents of your page and you can :
- Add A Page title.
- Add a Page subtitle.
Also you can style your Hero with a background image / video or color :
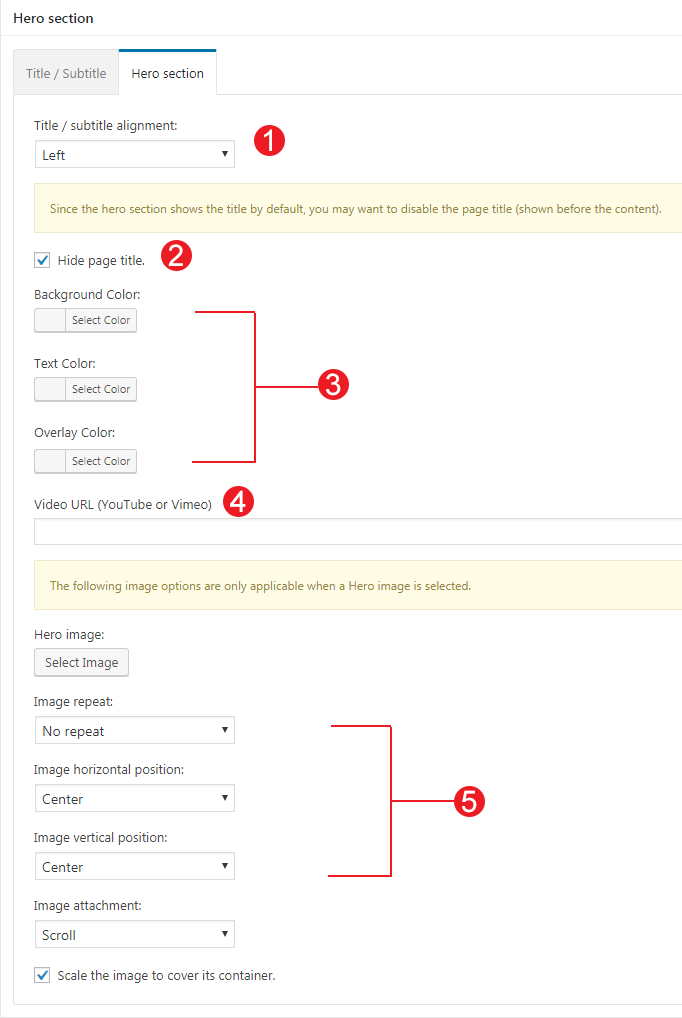
- Align the Title.
- Hide the Page title.
- Add a Background Color or an Overlay color in case you have a background image with the same color of your Hero title or subtitle.
- Add a background Video.
- Add a background image and change its position and screen coverage.
In the Frontpage Options you can also select a MaxSlider Slideshow to appear instead of a hero image or choose not to have a slideshow at all.
MaxSlider is a versatile plugin with many options for you to explore. Have a look at the plugins documentation here first on how to use it.
Blog
This will be your posts page. Just create and publish a blank default page named “Blog” (or whatever you wish to name it) without adding any content, no further action needed for now.
Full Width Page
In this page you can add any content you wish without displaying the sidebar.
Default Page
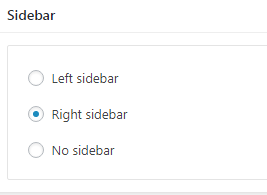
In this page you can add any content you wish but the the sidebar. You can select under Sidebar section where you need your sidebar to appear
Also, you can select whether you need to display the featured image in that page.
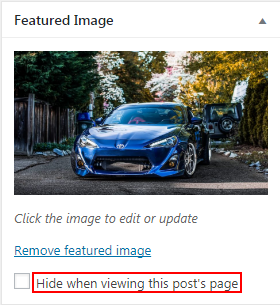
by checking the “Hide when viewing this post’s page” option in your Featured image box.
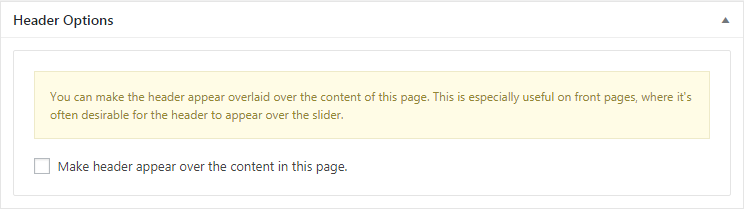
Header Options
The Hero Section is a generic options box you can find in All pages and will allow to to control where you need your header to appear.
Hero Section
The Hero Section is a generic options box you can find in All pages and will help your control the Hero Section for each page.
This the basic section before the contents of your page and you can :
- Add A Page title.
- Add a Page subtitle.
Also you can style your Hero with a background image / video or color :
- Align the Title.
- Hide the Page title.
- Add a Background Color or an Overlay color in case you have a background image with the same color of your Hero title or subtitle.
- Add a background Video.
- Add a background image and change its position and screen coverage.
Room and Testimonial listing pages
In order to display your custom post types you will need to create a listing page for each one. Go to Pages > Add New and create a new page selecting some its page attributes the Listing Template you need to Apply. Below you will find more information for each template.
Room Listing Template
Here you can list all your Rooms from a selected category or not. Let check all the Case Studies options:
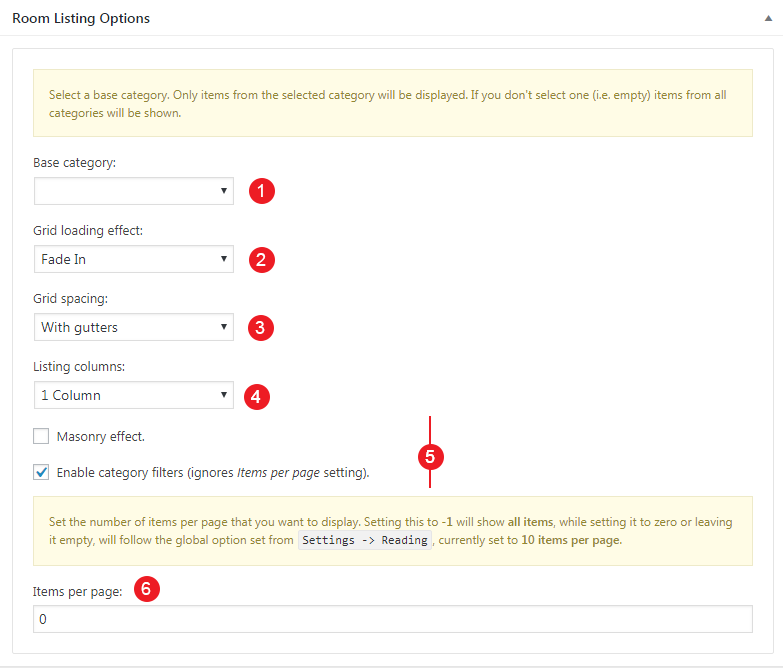
- Select a Base Category or leave blank if you wish all your Rooms to appear
- Select a loading Effect for your grid
- Select the spacing for your items
- Select the number of Columns
- Check if you need a masonry effect and category filtering
- Select how many items you need to render
Testimonials Listing Template
Here you can list all your Testimonials.
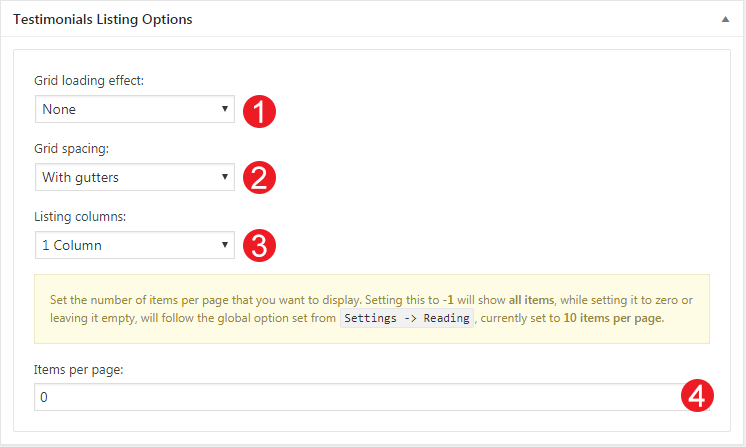
- Select a loading Effect for your grid
- Select the spacing for your items
- Select the number of Columns
- Select how many items you need to render
Page builder template
The theme comes bundled with a page builder template which allows you to use your favorite page builder plugin on it and create unique layouts very easily.
To use that template start by going to Pages > Add New. This will create a new page. Add a title to your page and select the Page builder template from the template drop down in the Page Attributes metabox.
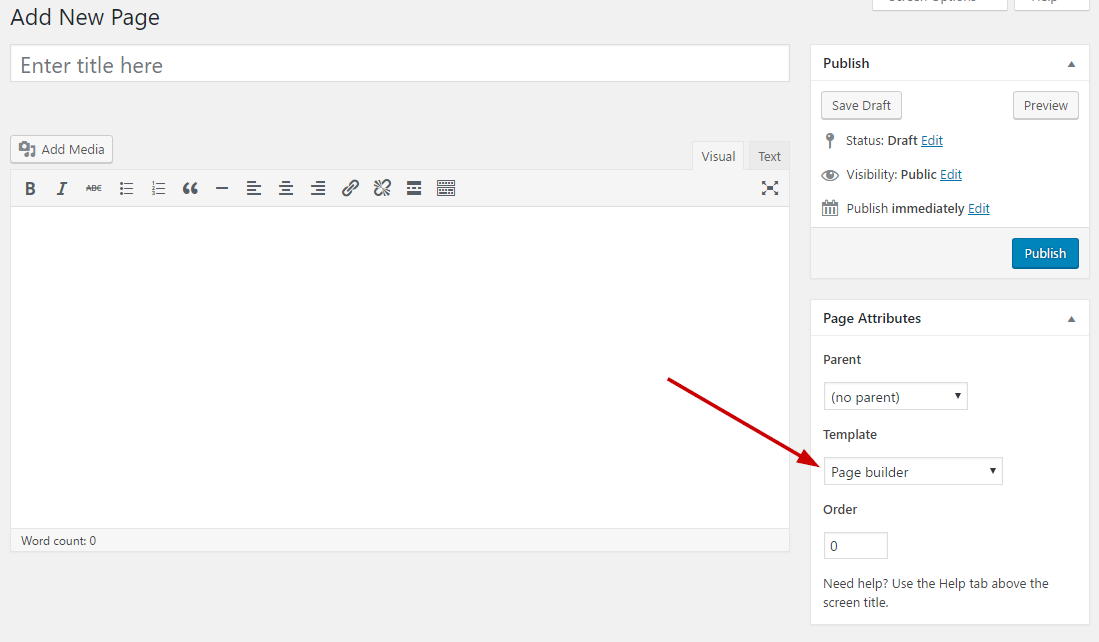
That’s it. You can now start building your page using a page builder of your choice. On the theme’s demo we have used extensively the Elementor page builder plugin.
Setting up your theme
In this section we are going to have a closer look in Kea’s unique features like Portfolio, Services, Case Studies, Team Members, Jobs, Events, Testimonial Items.
Adding Room Items
To add new Service item go to Room> Add new and fill in the title, content and featured image. In the Custom Excerpt metabox you can control the content after the title in the single Room and in its listings.
In the Room information section you can:

- Add a Room price (text).
- Add a special offer text.
- Show or hide the price in the Room.
You can also add your Room amenities which you can render them anywhere inside your content using the [amenities] shortcode
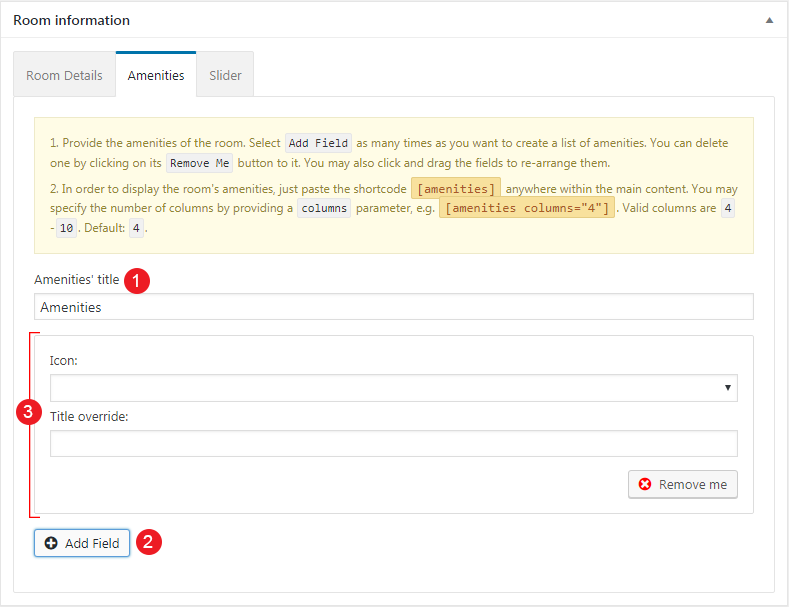
- Add a title for your Amenities
- Create a new field
- Add an Icon and a description text.
Finally in the Slider tab you can add some images for your Room Slider.
To add new Testimonial item go to Testimonial> Add new and fill in the title, content and a featured image.
Customizing Your Theme
All theme customization is done via WordPress’s built in customizer. If you haven’t used it or want to learn more about it, please read this article.
Go to Appearance > Customize and you will see this

TIP: any changes you make in the tabs below will be previewed live on the site which appears in right side of the screen, however to save these changes you need to click the Save & Publish button on the top of the bar, if you have made a change but see the button grayed out (for example changed the font size of a heading), move the cursor outside the input box, for example, to the next input box, then the button should be clickable again.
Let’s take a look at the options each tab gives you.
Header
Header Options are split into three sections.
In the Header style section you can set the logo layout you wish your header to have and make it full width.
Under the Top menu bar you can add some custom text to it like your email or phone number. as well as select whether you need to show or not Search module or your social Icons.
In the Primary menu bar you can select if you wish to have a sticky menu and change various display settings like the vertical padding of the menu and its text size.
Site Identity
Here you can change the logo and favicon as well as the title and description. Use the appropriate fields to add your information, show or hide your site title and subtitle and upload your logo and site icon images.
Blog Settings
This tab allows you to customize your blog and post options.
Under Post Options you can select which elements you wish your single blog posts to have. This includes showing or hiding the date, the featured image, the author and author box etc. Or even enabling/disabling the Lightbox option for your galleries.
In Archive options you have customize the default WordPress archive pages like category, tag, etc.
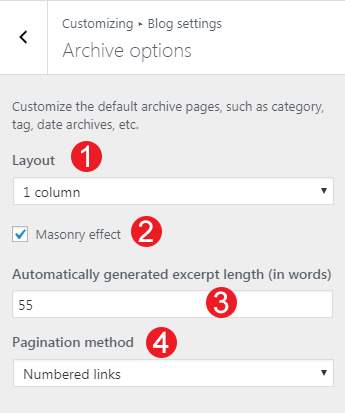
- Change the Layout by selecting in how many columns you need your content to appear.
- Enable Masonry effect in case you have articles with different content and featured image height.
- Select the article excerpt length.
- Select a pagination method.
Colors
This tab allows you to customize the colors and background images for the entire site, the top bar and header, hero section, sidebars and the footer.
Typography
Through this tab you can control the font size and family of key theme elements, such as headings, body, and widgets. You can choose from all Google Fonts Directory.
Menus
Here you can create and assign menus to the theme. To learn more about menu creation check out the Codex’s menu user guide here.
Titles
In this tab you can change the titles for various theme pages, like the blog, search and 404 as well as for your related items in single Portfolio.
Social Networks
In this section You can add your Social Network URLs. These icons will be displayed in the Theme-Social Icons Widget automatically.
Footer
Here you can modify the credits text and your Footer Column Layout.
Additional CSS
In this tab we host the custom CSS panel which you can use to insert styles for elements not covered in the rest of the tabs.
Other
Here you can download your sample content files.
Widgets
Through this tab you can add widgets to the theme’s sidebars. The theme features eight Sidebar Areas in order to provide the best option to display your content.
Static Front Page
Use this tab to make the Home page your static front page so you can take advantage of the homepage template we have created for you.
Widgets
We have handcrafted some custom widgets to help you better display your content. You will find them under Appearance > Customize > Widgets or Appearance > Widgets
Theme-Contact
Using this widget you can create a contact box including a title a map and various complementary elements with icons that will help you add more information like telephone etc about your business.
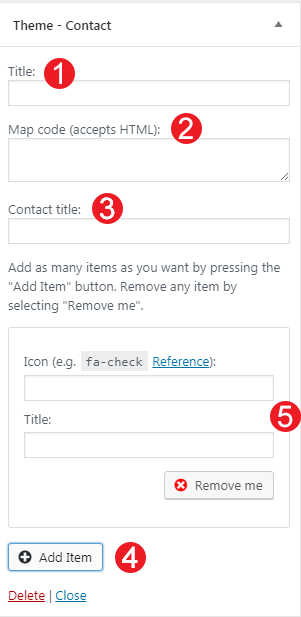
- Add a title for your Contact widget.
- Add a map code (iframe).
- Add a contact title
- Create new complementary elements.
- Add an icon code (from fontawesome.io) and some text along.
Theme-Schedule
This widget allows you to create a small Schedule table with extra contextual information.
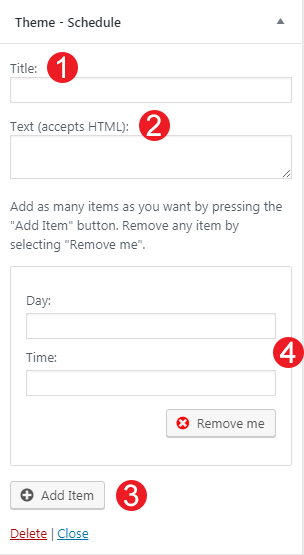
- Add a title for your widget
- Add some complementary text. You can use HTML tags also if you wish.
- Add a new day/time widget.
- Add your day and time information for each item.
Theme(home)-Instagram
This will allow you to display your Instagram Account in your Front Page or Pre-Footer sidebar. The WP Instagram Widget must be installed and activated in order this Widget to appear

- Add a title for your Instagram Widget.
- Add your Instagram Account.
- Add a number of photos you wish to display.
- Select whether you need your images to open in the current window or open in a new tab.
- Change the link text.
Theme-Latest Post Type
This widget is built to help you display your latest posts in any widget area you wish.
- Add a title.
- Select the post type you want to get the latest items.
- Check if you need random posts instead.
- Add the number of posts.
Theme(home)-Post Type Items
This widget is built to help you display any post you wish in your Homepage Widget area.
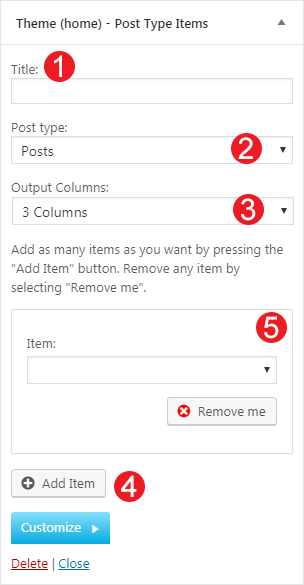
- Add a title.
- Select the post type.
- Select the output columns.
- Add the Item you wish to output.
- Select the Item from the dropdown menu.
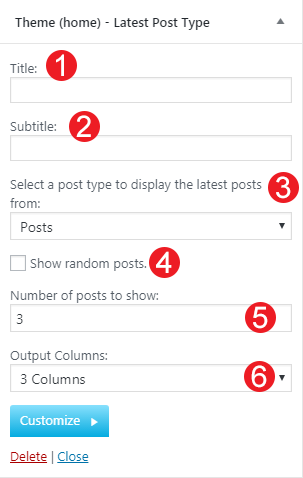
Theme(home)-Latest Post Type
This widget is built to help you display your latest posts in your Homepage Widget area.
- Add a title.
- Add a subtitle.
- Select the post type you want to get the latest items.
- Check if you need random posts instead.
- Add the number of posts.
- Select the output columns.
Theme-Social Icons
This widget displays your site’s social icons. In order to set them up, you need to visit Appearance > Customize > Social Networks and provide the appropriate URLs where desired.
Theme (home)-Hero Callout
This will allow you to display a Hero Callout specially designed for your frontpage sidebar.

- Add a Title for your Callout widget.
- Add a Subtitle for your Callout widget.
- Select a Button text and a URL.
- Change the text alignment.
Theme-Buttons
This widget will help you render a list of buttons.
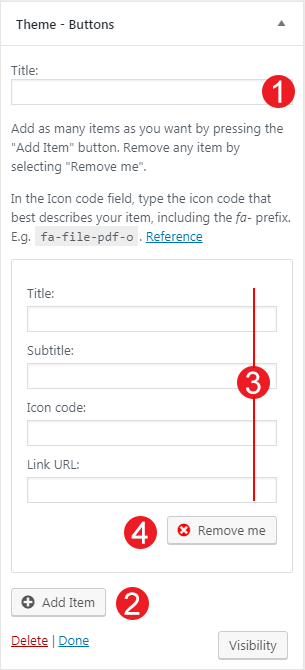
- Select the Widget Title.
- Add a new button.
- Add the button Properties, like title,subtitle, icon and link.
- Remove the button.
Theme(home)-Brands
Show a list of brands in your frontpage sidebar.

- Add a title and a subtitle for your widget
- Add a new brand item.
- Select your brand logo.
- Select a URL that your brand logo will target.
- Remove the brand item
Theme-Hero Callout
This will allow you to display a Hero Callout in all your sidebars.
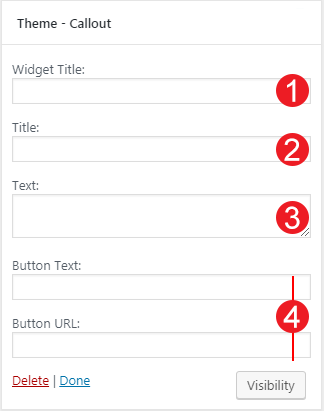
- Add a Title for your Callout widget.
- Add a Subtitle for your Callout widget.
- Select a Button text and a URL.
- Change the text alignment.
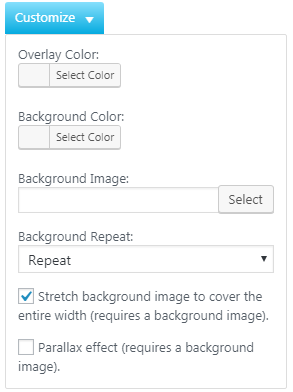
Customize Widgets
In some themes widgets, You can use the Customize button to add a background image or color. You can also create a color overlay or stretch your background image to cover the entire width of the widget. You can also enable a parallax effect for your background image.
Shortcodes
Shortcodes in WordPress are small code like functions that allow you to do various things with little effort. The main reason to use them is to execute code inside WordPress posts, pages, and widgets without writing any code directly. They can be used in Elementor’s (or any other page builder) shortcode module.
Kea theme has two shortcodes you can use with various attributes:
[latest-post-type]
and
[amenities columns="4"]
You can display you amenities in columns
Next Steps
Still have questions or problems setting up your CSSIgniter Theme? We will be happy to help you out! Please visit our support Hub