Knowledge base
Categories
Create a multilingual site with Polylang and an Ignition Framework based theme
Creating a multilingual site with an Ignition Framework-based theme is as simple as with any other theme. In this guide we take a look at how to create a bilingual site using the Aegean Resort theme. We are going to use the Polylang plugin to achieve our goal.
Polylang
Polylang is the most popular free WordPress plugin which helps you create multilingual sites. There is a pro version available which offers some advanced features, but the free one should be enough for most users.
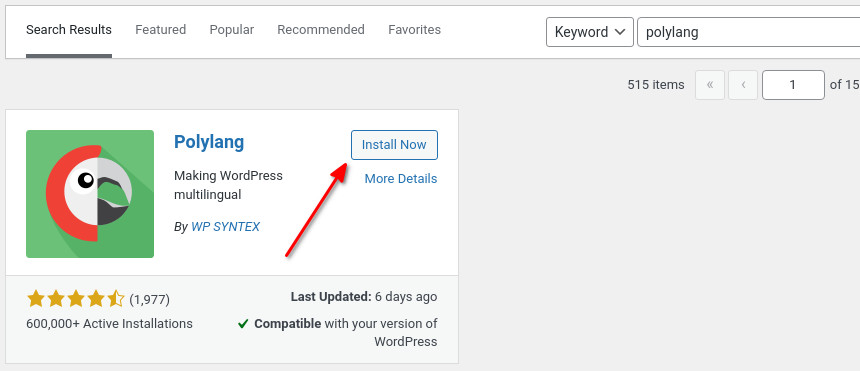
Start by installing and activating the plugin. Navigate to Plugins > Add New and search for Polylang. Click the Install button and then the Activate one.
Onboarding
Once the plugin is activated you will be presented with its onboarding page. We recommend to go through with it because it makes the initial setup very easy.
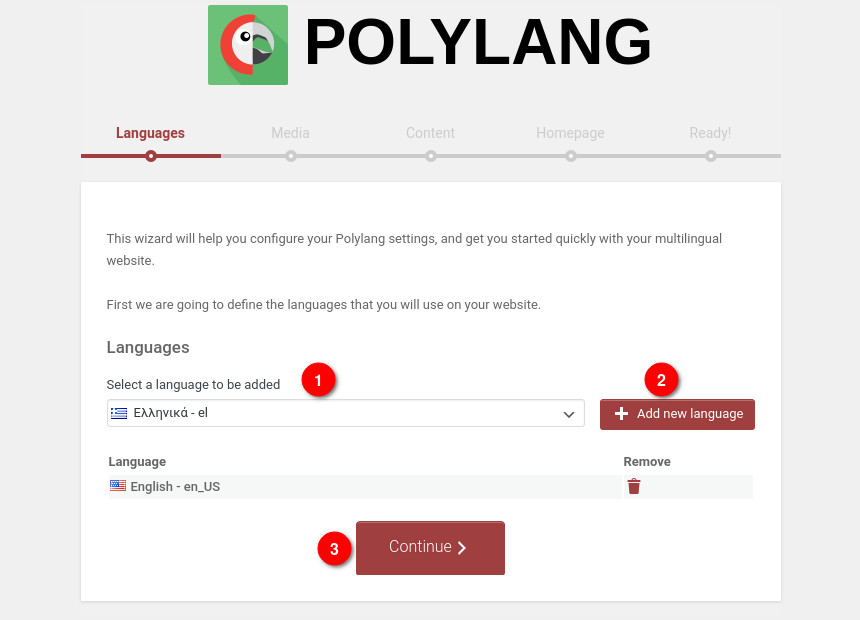
In the first page of the onboarding page you need to select the languages you want to translate your site in. To do that, select a language from the dropdown (1) and click the Add new language button (2) to add it. Repeat for as many languages as you want and once done click Continue (3) to go to the next page.
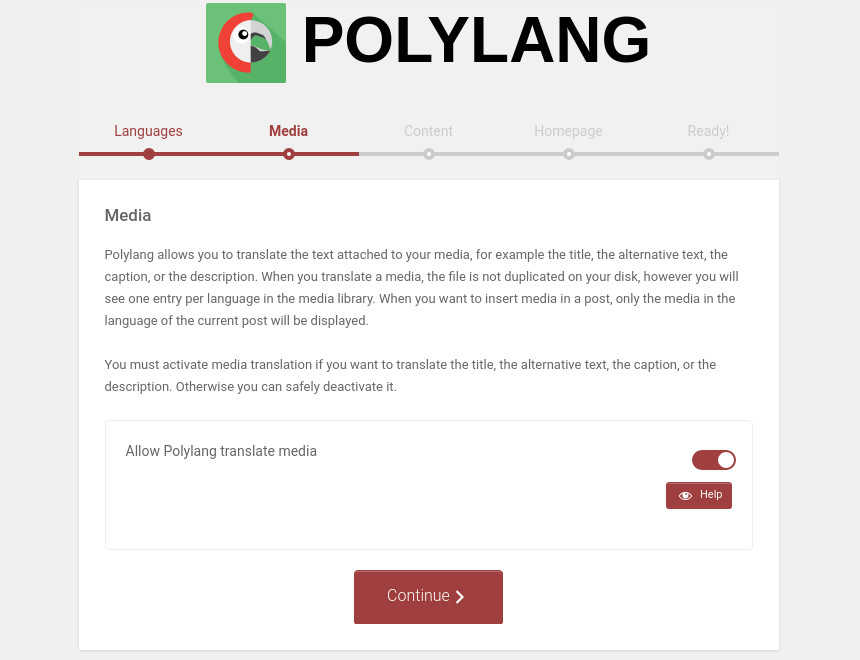
In the next page you can configure if the plugin will handle media translations. If you want to be able to translate captions, alternative text, descriptions and image titles, you should leave this on and continue.
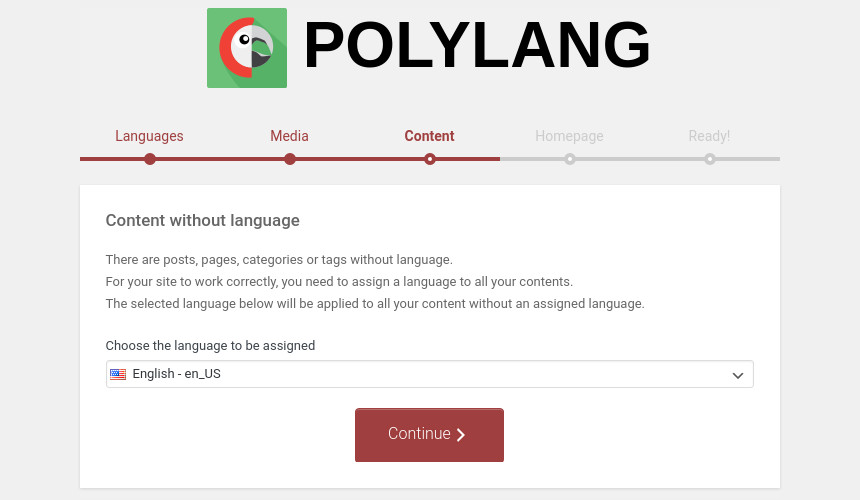
In this step we will set the language for any existing content, so if you have any content, pick the language it’s written in from the drop down and continue.
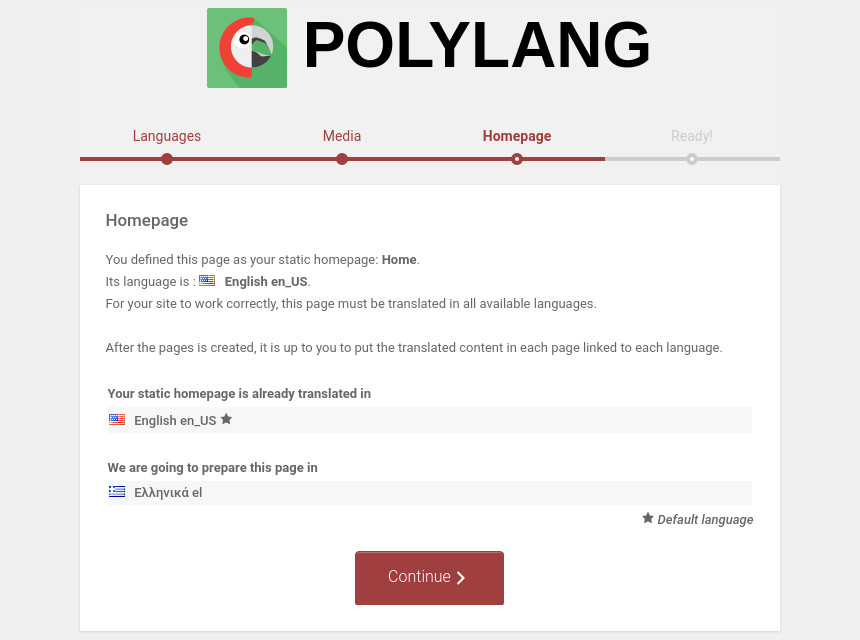
This step will create a copy of your static home page for each available language. Of course you will need to translate its content later.
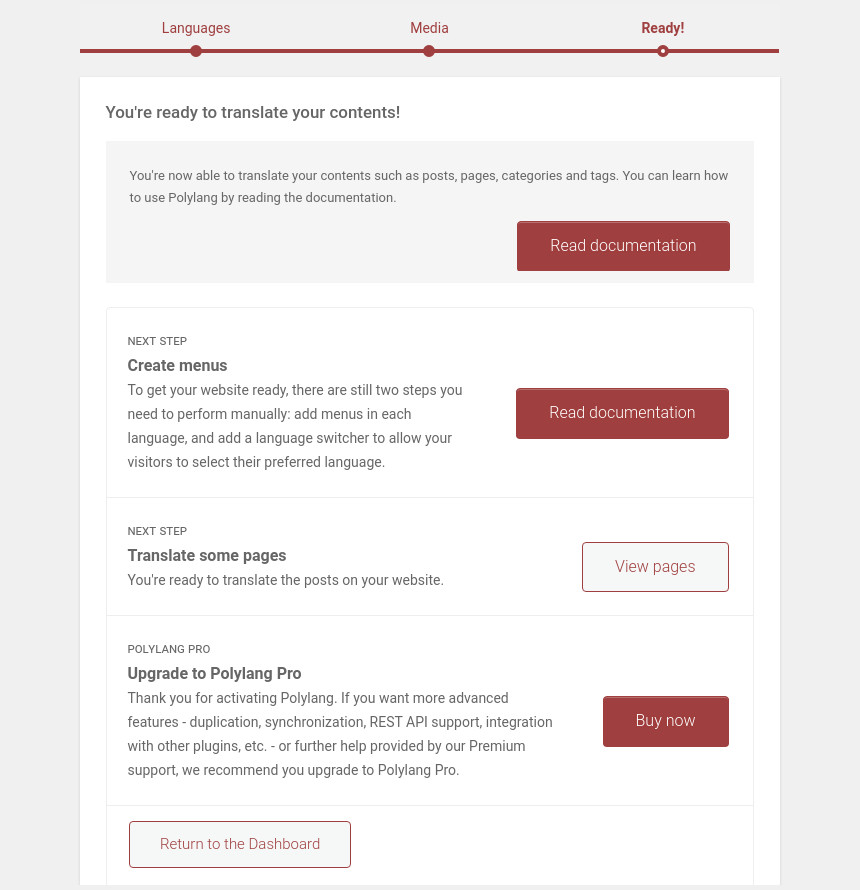
This final step of the onboarding process provides very useful links to the plugin’s documentation. It’s recommended that you take a look at them since they will be very helpful if you get stuck anywhere while translating your site.
Translating items
Now we’re ready to start translating our content. Let’s start with a post. Go to your Posts in the dashboard.
![]()
You will notice that a languages column has been added. The flag you see in each post is the configured language for that post. Under the other flags you will see a plus sign, which means that there is no translation for that language. Click the plus sign to start adding a translation for the selected language.
Adding the translation is just like creating a post. Add the title, content and any meta required and publish it.
Translating categories
Our post had the offers post category applied to it. When translating we added a new category to our post which will be the translation of the offers category, now we need to let the plugin know that this is in fact the translation of the offers category. To do that go to Posts > Categories and edit the new category.
![]()
Set the language the category is written in and from the translations section select the original category, save it and you are done.
![]()
As you can see now we have the post translated in two languages, with its category also translated. Notice that now in the languages column, instead of the plus button to add a new translation we have the edit one, which means that the item is translated and we can edit the translation at any time.
The procedure for translating pages and custom post types is the same as with normal posts.
Enabling translation for custom post types
By default custom post types will not appear as translatable, however you can easily enable this feature.
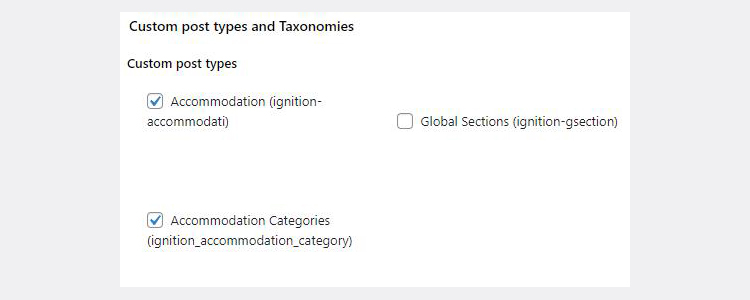
Navigate to Languages > Settings and from the Custom post types and Taxonomies section check the Accommodation and Accommodation Categories (or any other custom post types and taxonomies you want to translate). Save Changes and you are good to go. Your final settings should look like the ones below.
Creating a menu
After you are done translating your content you will need to add a menu for the rest of the languages present on your site. Creating a menu for the translated section of your site is pretty straight forward. Navigate to Customize > Menus and click the create new menu button.
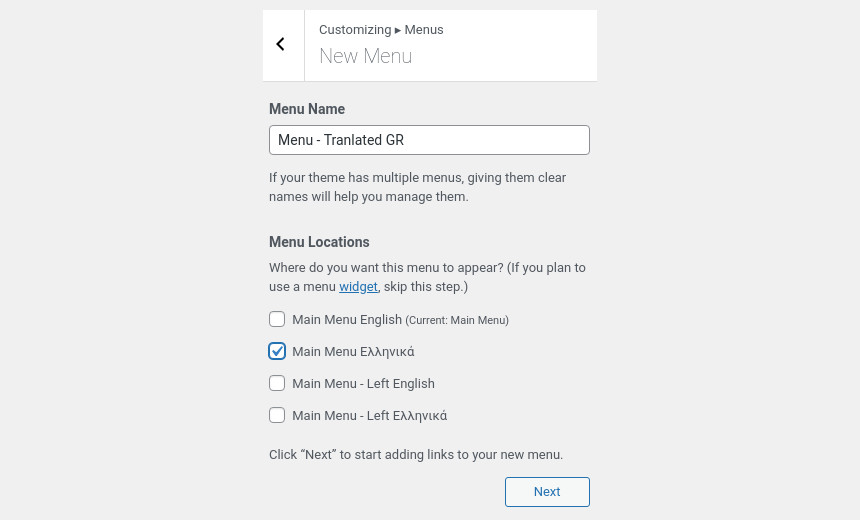
Start by giving your menu a proper name. Then notice that under menu locations there is a language attached to each of the registered menu locations. Select the correct location and the correct language for your menu and proceed to the next step to add menu items to your new menu. Of course you will need to add only items that correspond to the translation you are working with, don’t mix items of different languages in the same menu. Read this guide to get a primer with WordPress menus.
Add a language switcher to the top bar
The Ignition Framework bundles a shortcode specifically built to create a language switcher. To add one to the site’s top bar navigate to Customize > Top Bar and add it to any content area.

In the example above we have use the following shortcode:
Of course you can use the language switcher shortcode in any of the theme’s content areas in the top bar, header, footer, widgets or even in the content.
Translating widgets
Translating widgets is very easy. Navigate to Appearance > Widgets and notice the language drop down that appears in each widget.
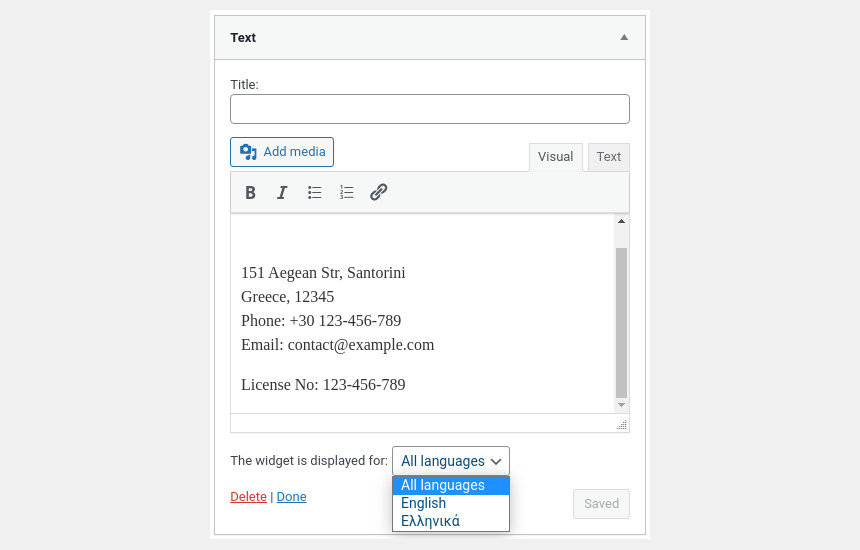
From the drop down select in which language this particular widget will appear in and save it. Now create a new widget of the same type, add he same content but translated and select the proper language for it in the drop down. That’s it, now each widget will only appear on its set language.
Translate dynamic strings
Some strings, like for the site’s title and tagline or the title and content of text widgets, can be translated under Languages > Translations.
![]()
Each string has an input for each language, you can translate the string there and save the translation.
Translate static strings
Take a look at this knowledge base article for info on how to translate static strings.