Documentation for VideoIgniter
Creating a video playlist
To create a video playlist navigate to VideoIgniter → Add New Playlist.
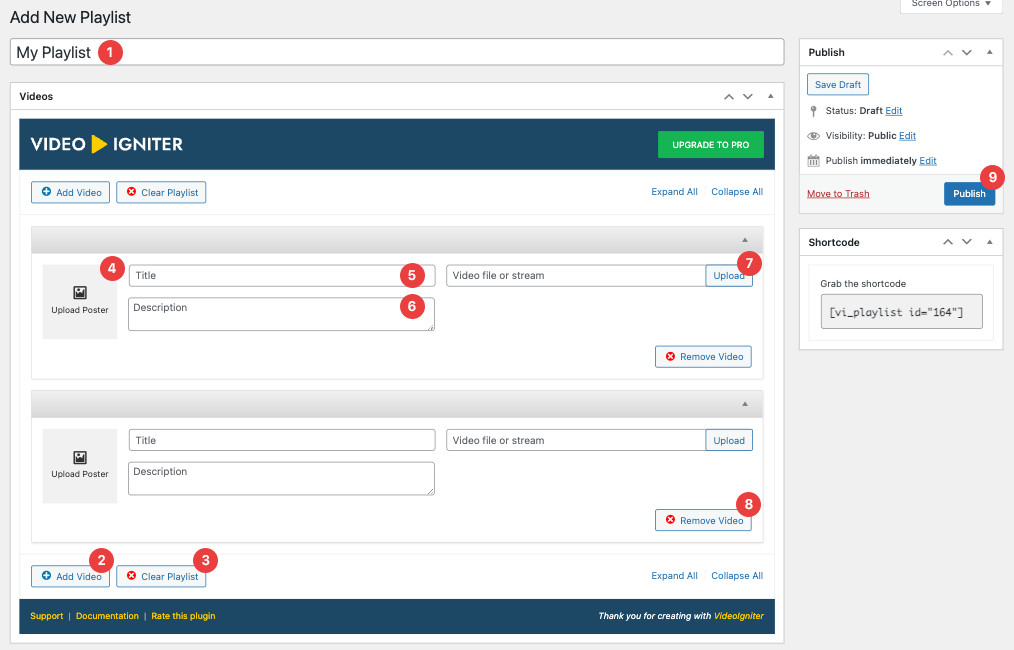
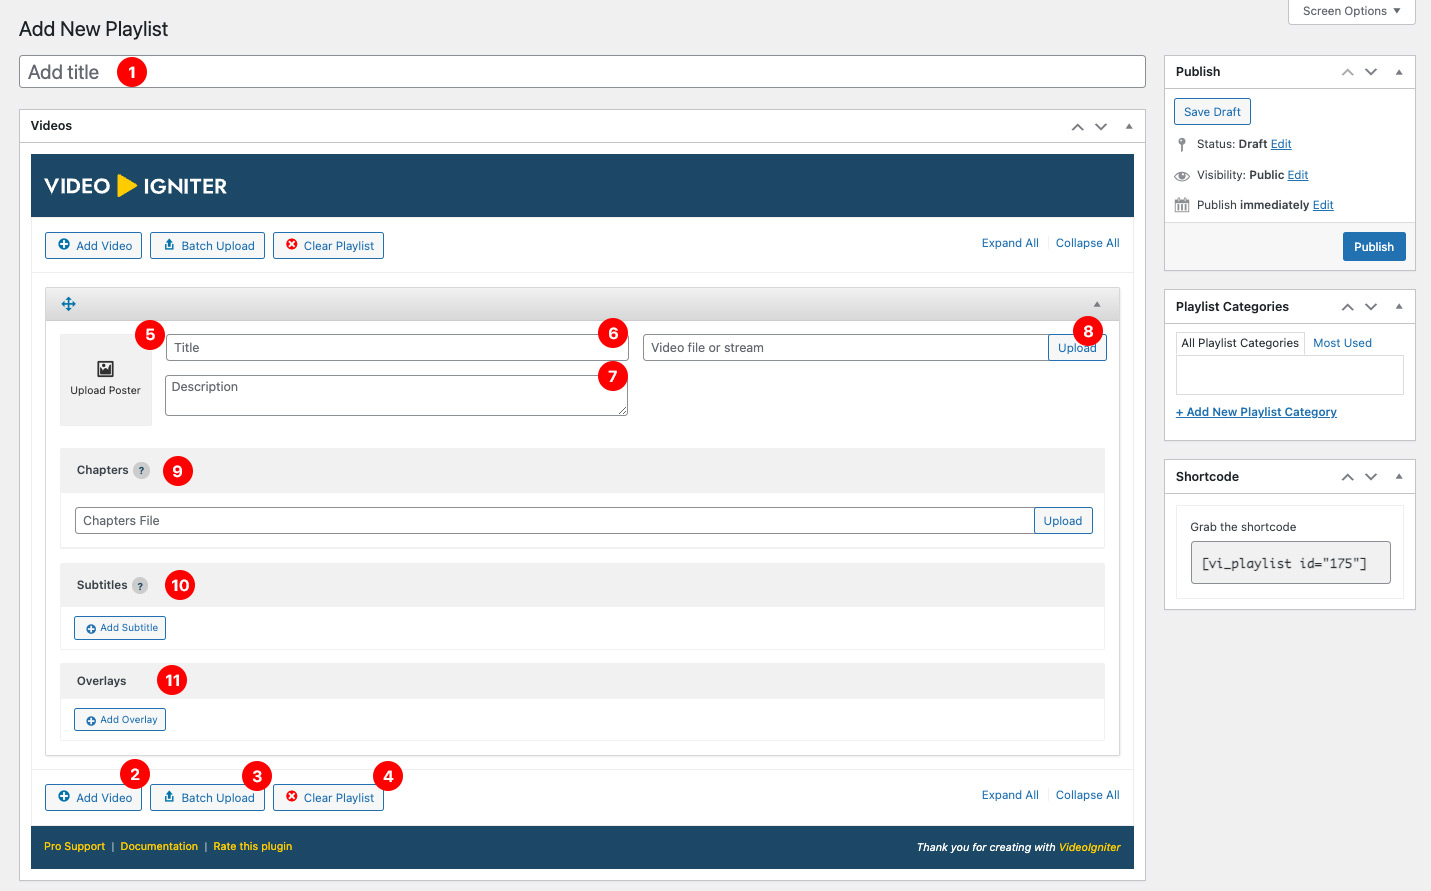
In the image above you’re seeing the video playlist interface. Below we take a step by step approach on adding a video track:
- Add a title to your playlist
- Click the “Add Video” button to add multiple video tracks
- Clear the playlist (only click in case you want to remove all videos and start over)
- We start by adding a video poster (the video’s cover image). Click the placeholder image and WordPress’ media manager will pop-up and allow you to upload an image or select an existing one.
- Fill in the video’s title (optional)
- Add a small description for your video (optional)
- Upload a video file (or select an existing one). Multiple video filetypes are supported, along with
m3u8HLS (HTTP Live Streaming) - Remove a video by clicking on the Remove button (note, you’ll need to have at least two tracks for the remove button to appear)
- Repeat to add the rest of your videos of your playlist and Publish it
Keep in mind you can simply upload just one video.
Player settings
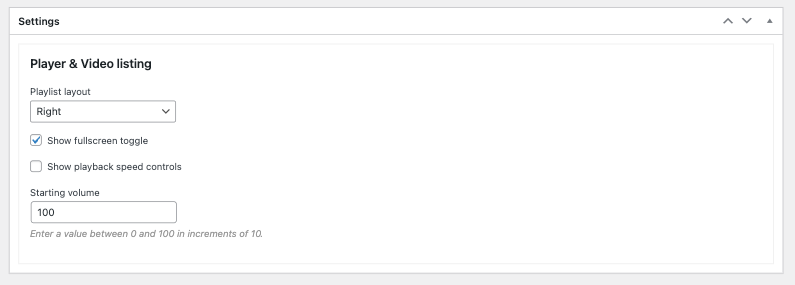
Every video playlist carries a set of settings, in the free version of VideoIgniter those are:
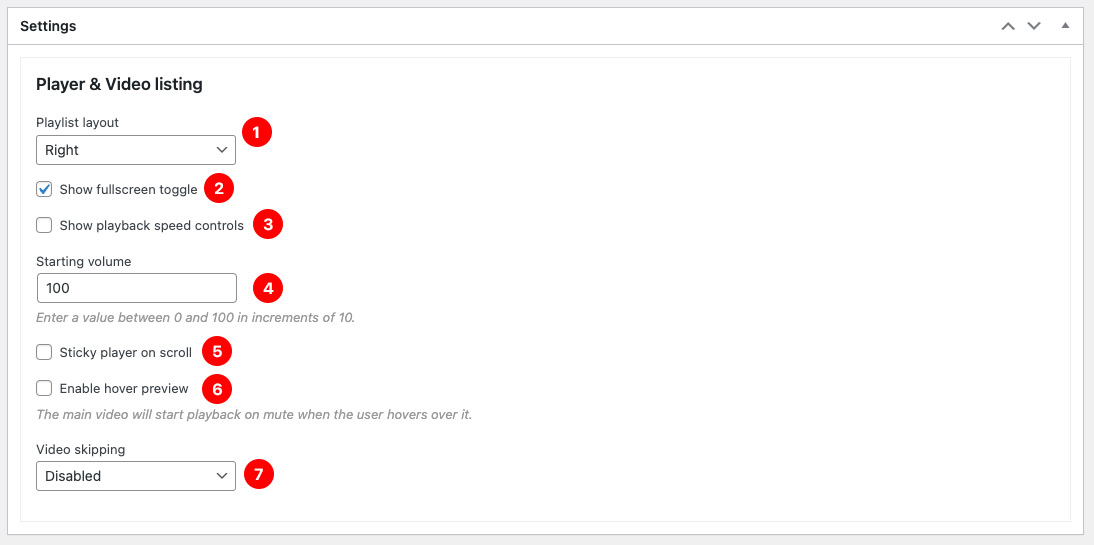
Playlist layout: Choose where the video thumbnails will appear (left, right, or bottom) when the playlist contains more than one video.
Show fullscreen toggle: Whether to show the button that enables fullscreen viewing or not.
Show playback speed controls: Whether to show playback speed controls on the player.
Starting volume: Choose a volume that player should start with (0-100).
VideoIgniter settings
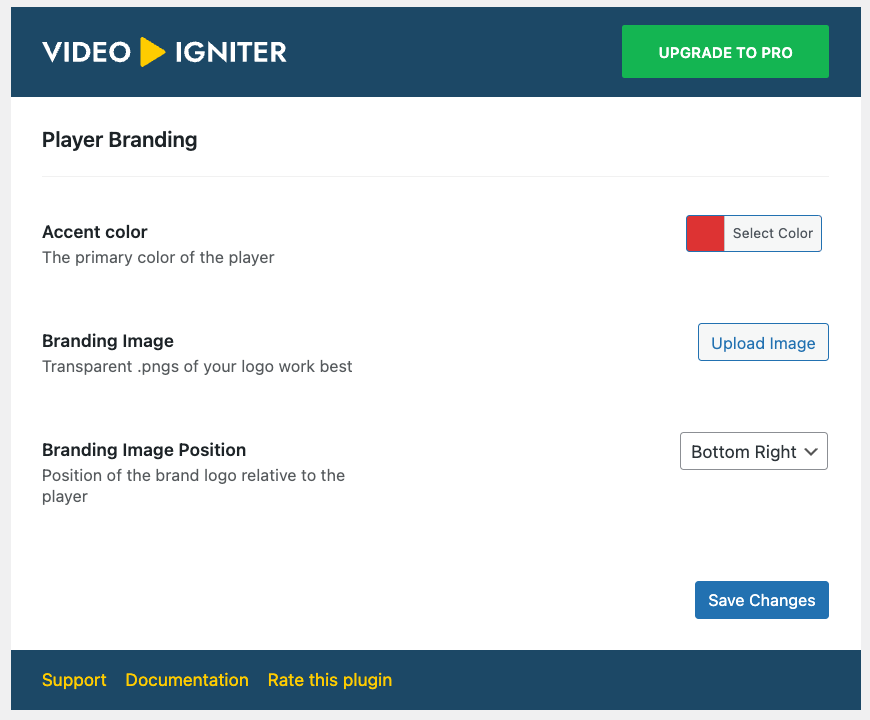
Navigating to VideoIgniter > Settings will reveal global settings that apply to every video playlist:
Accent Color: Choose the primary color of the video player. This will color apply as the accent color on elements like the progress bar, etc.
Branding Image: Optionally upload an image (i.e. your desired logo). Transparent png files work best, and for optimal viewing the width should be at around 400px.
Branding Image Position: Choose where the brand image will be placed (from top left to bottom right)
Displaying a video playlist
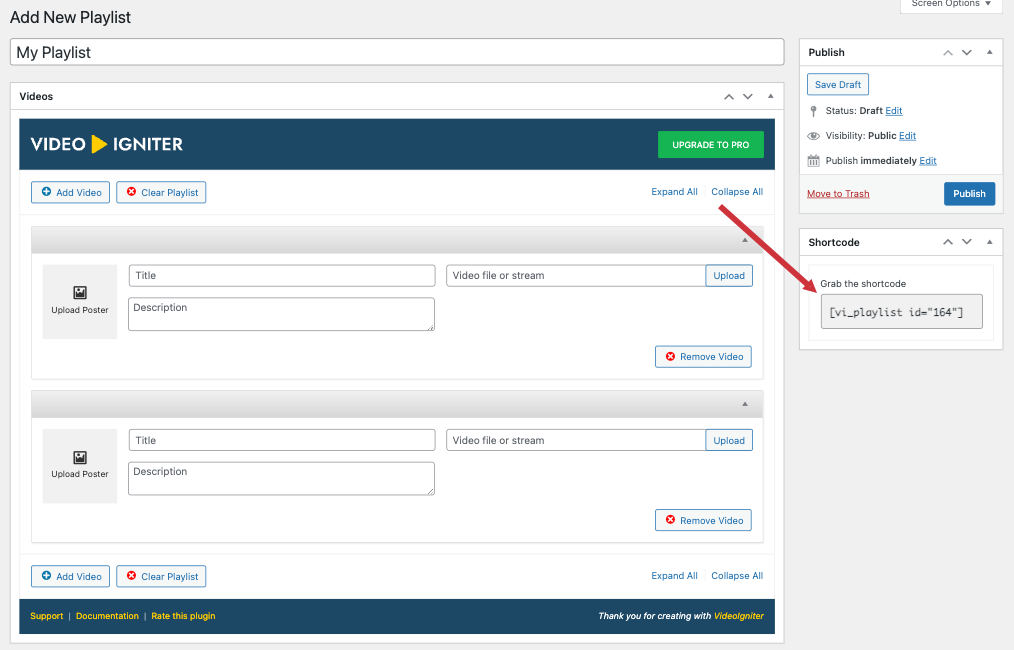
Shortcode
To display a video playlist you need to grab its shortcode (you can find it in the shortcode metabox on the right of your playlist). Simply copy the shortcode text, and then paste it in any post or page.
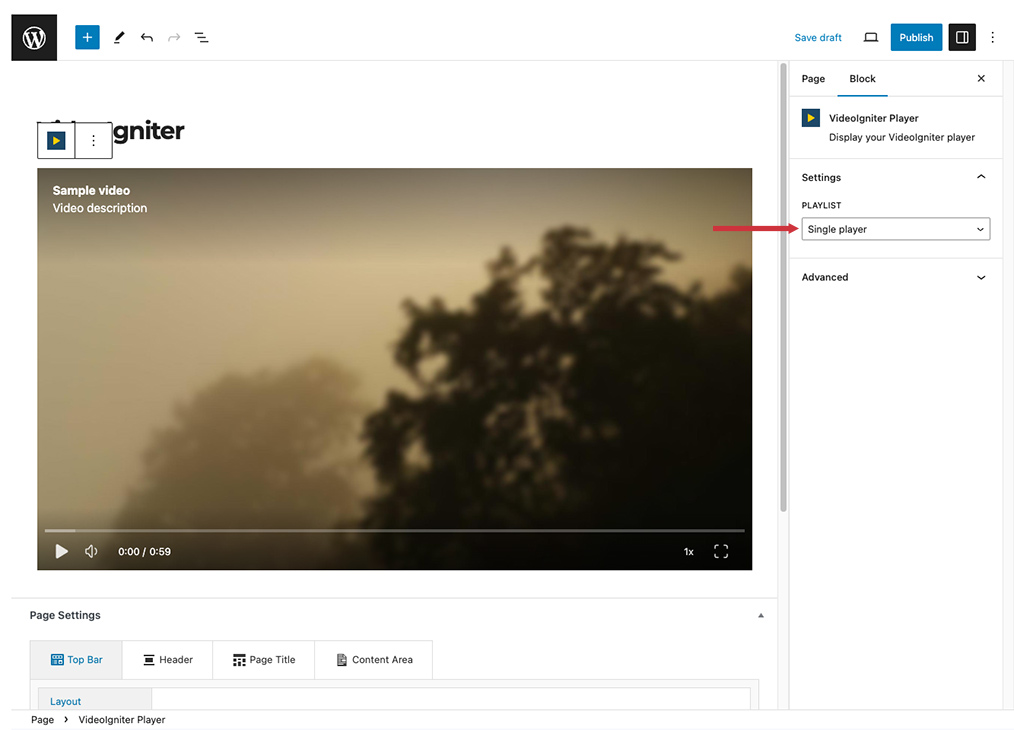
Custom block
Alternatively, simply use VideoIgniter’s player block to quickly insert a video playlist in a post or page. Inside the post editor, add the “VideoIgniter Player” block, and select your playlist from the “Playlist” dropdown setting.
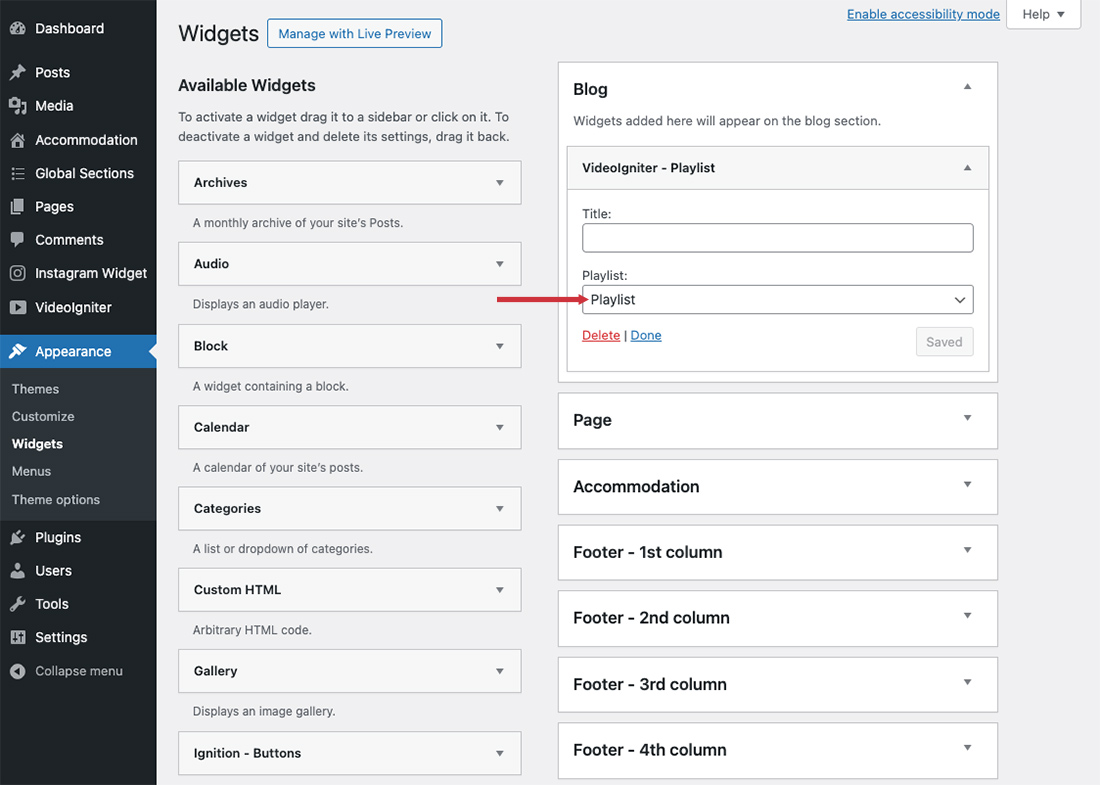
Custom Widget
No need to hack your way through with text widgets. If you need a video playlist in any of your theme’s classic widget sidebars, VideoIgniter offers a native widget. Navigate to Appearance → Widgets or Customize → Widgets and place the VideoIgniter – Playlist widget in any sidebar. Give it a title, select a playlist from the drop-down and hit “Save“. Done!
Supported file types
The plugin supports the following extensions/formats:
- .3gp – 3GPP
- .avi – Audio Video Interleave
- .flv – Flash Video
- .m3u8 – HLS stream contained in a M3U8 playlist
- .m4v – M4V
- .mkv – Matroska Video
- .mov – QuickTime File Format
- .mp4 – MPEG-4 Part 14 file format
- .mpd – MPEG-DASH
- .mpeg – MPEG-2
- .mpg – MPEG-2
- .ogv – Ogg Theora video
- .webm – WebM
- .wmv – Windows Media Video
Additionally, YouTube and Vimeo URLs are also supported.
Please note that while VideoIgniter supports these formats, not all browsers and devices may be able to play all these.
VideoIgniter PRO
Installation
To get the plugin’s installable zip file navigate to our downloads section here and search for VideoIgniter or simply navigate to Premium WordPress Plugins and find VideoIgniter PRO.
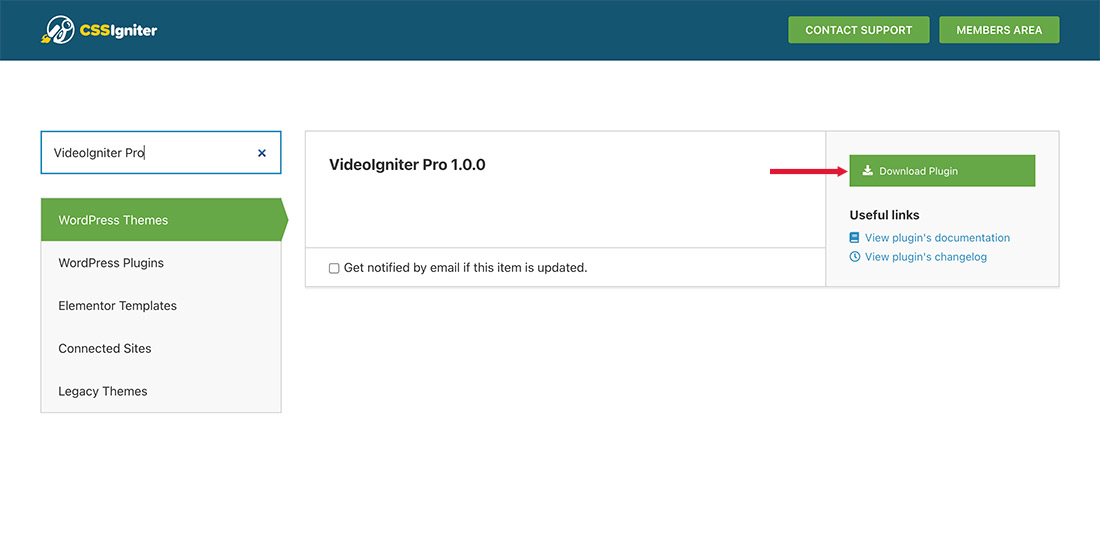
Click the green download button and save the zip file when prompted.
Next, navigate to Plugins → Add New in your WordPress dashboard and click the Upload Plugin button.
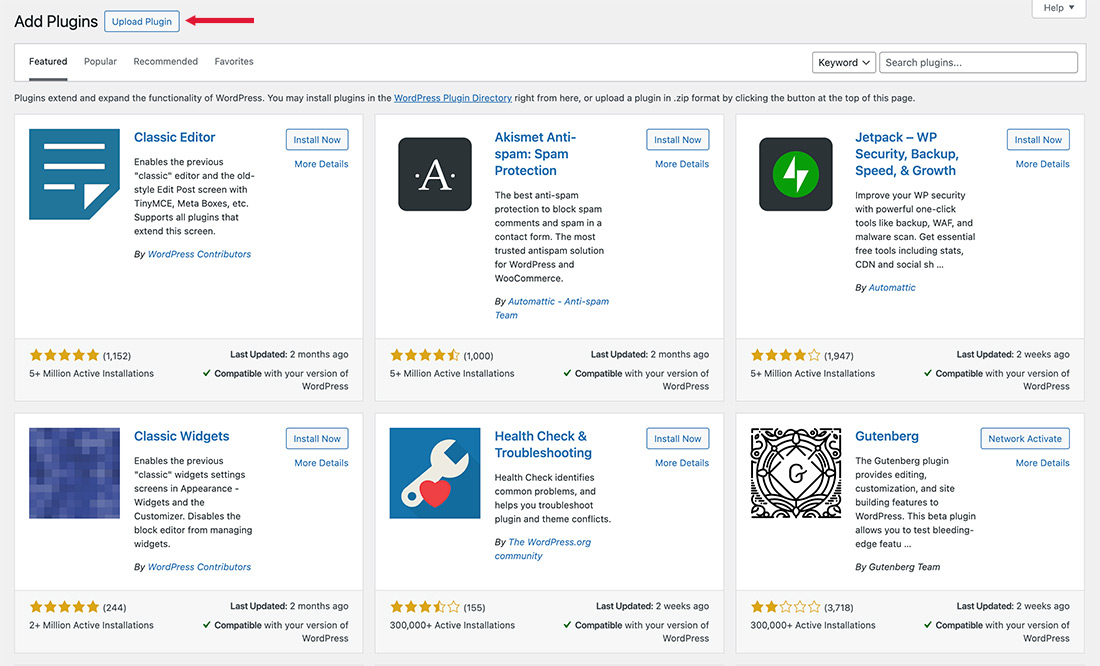
Next click the Choose File button, search for the zip file you downloaded a moment ago, select it and then click the Install Now button.
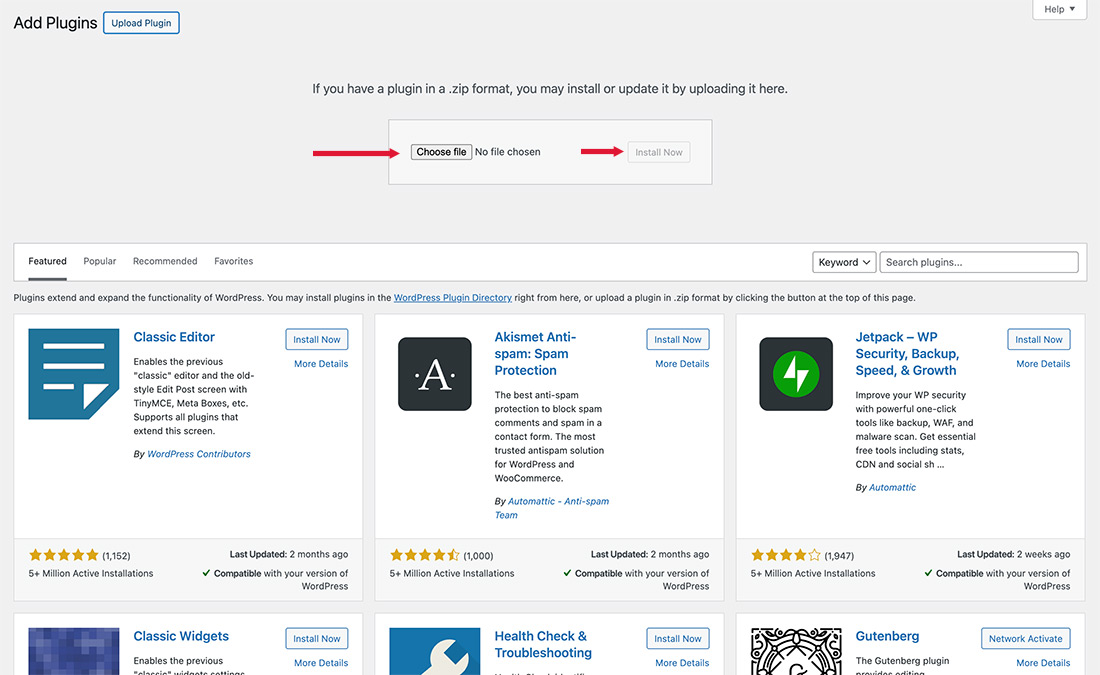
Finally click the Activate Plugin link and you are done. The Pro version of VideoIgniter is an addon for the free version. You will need to have both plugins active.
Pro Features
Once you install and activate VideoIgniter PRO you get all its additional features, let’s have a closer look at them.
Creating a playlist in the Pro version
To create a playlist navigate to VideoIgniter → Add New Playlist.
- Add a title to your playlist
- Click the “Add video” button to add multiple video tracks
- Batch upload: Upload multiple video tracks at the same time via the media uploader.
- Clear the playlist (only click in case you want to remove all videos and start over)
- We start by adding a video poster (the video’s cover image). Click the placeholder image and WordPress’ media manager will pop-up and allow you to upload an image or select an existing one.
- Fill in the video’s title (optional)
- Add a small description for your video (optional)
- Upload a video file (or select an existing one). All video filetypes are supported, along with
m3u8HLS (HTTP Live Streaming) - Upload a Chapters file in VTT format.
- Add Subtitles in VTT format.
- Add one or more Overlays.
- Repeat to add the rest of your videos of your playlist and Publish it.
Chapters and Subtitles VTT files
Web Video Text Tracks (VTT) files are a standard format for displaying timed text tracks (such as subtitles or captions) with video content. They are part of the HTML5 standard and are broadly supported across modern video players and streaming services.
A VTT file is essentially a plain text file that contains time-coded data. This data aligns with the video’s timeline, enabling the display of text at specific intervals. The basic structure of a VTT file includes:
- Header: A line that starts with WEBVTT to identify the file format.
- Cue Blocks: Each block contains a time range and the text to display during that range. The time range is in the format hours:minutes:seconds.milliseconds.
VTT files can be used not only for subtitles but also for adding chapter markers to videos. This enhances the user experience by allowing viewers to navigate directly to different sections or chapters of the video.
You can create a VTT file for either chapters or subtitles by using a text editor. Here’s a sample file:
Adding subtitles
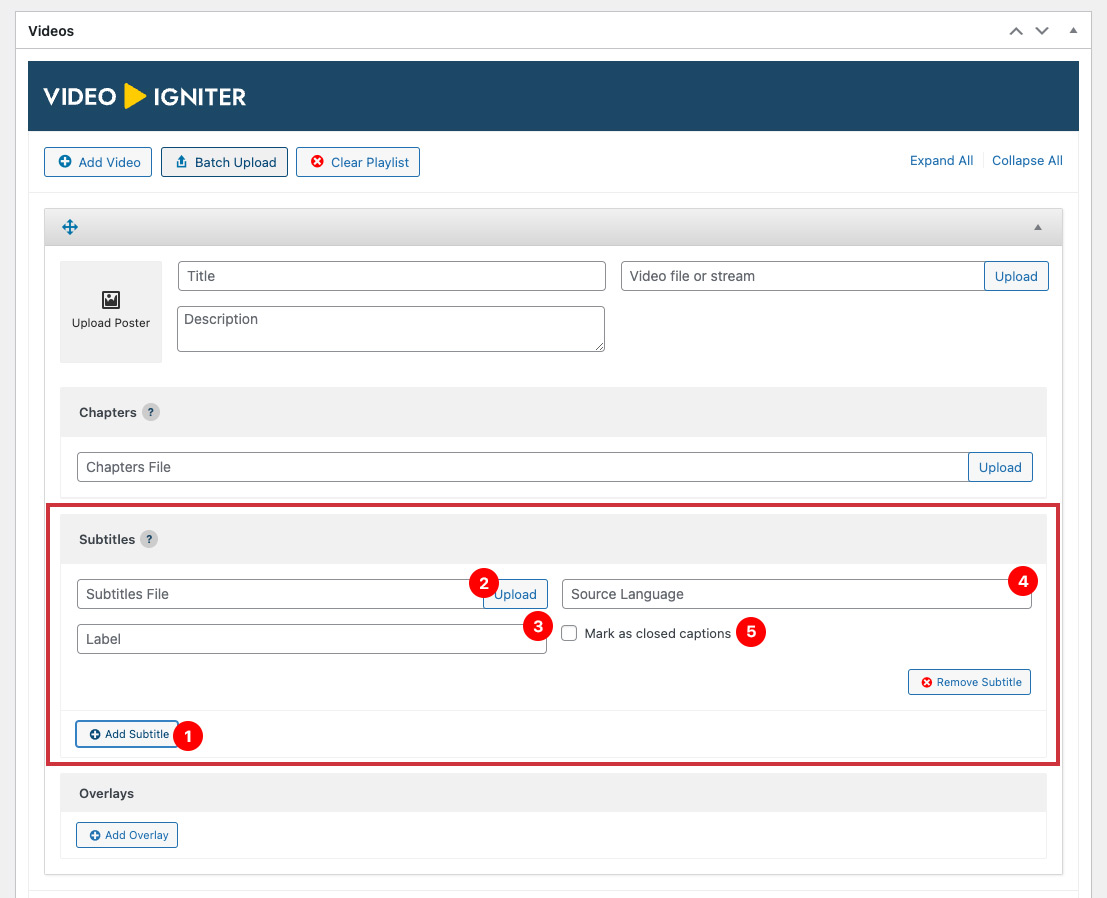
- Add Subtitle: To add a subtitle start by clicking this button. You can add multiple subtitles for different languages.
- Subtitles File: Upload your subtitles .VTT file for this language.
- Label: The user facing label for your subtitle (i.e. “English”, “French”, etc). This field is mandatory.
- Source Language: The code of the source language this subtitle is for. It must be a valid BCP 47 language tag. This field is mandatory.
- Mark as closed captions: Whether the subtitle should be displayed as closed captions using the “CC” icon.
Adding overlays
You can add overlays while the video is playing. Overlays are small blocks of content positioned on top of the player. You can define exactly when they show up and hide, and display images, text, and an external link. Using overlays you can promote any kind of content, from other videos, to ad blocks.
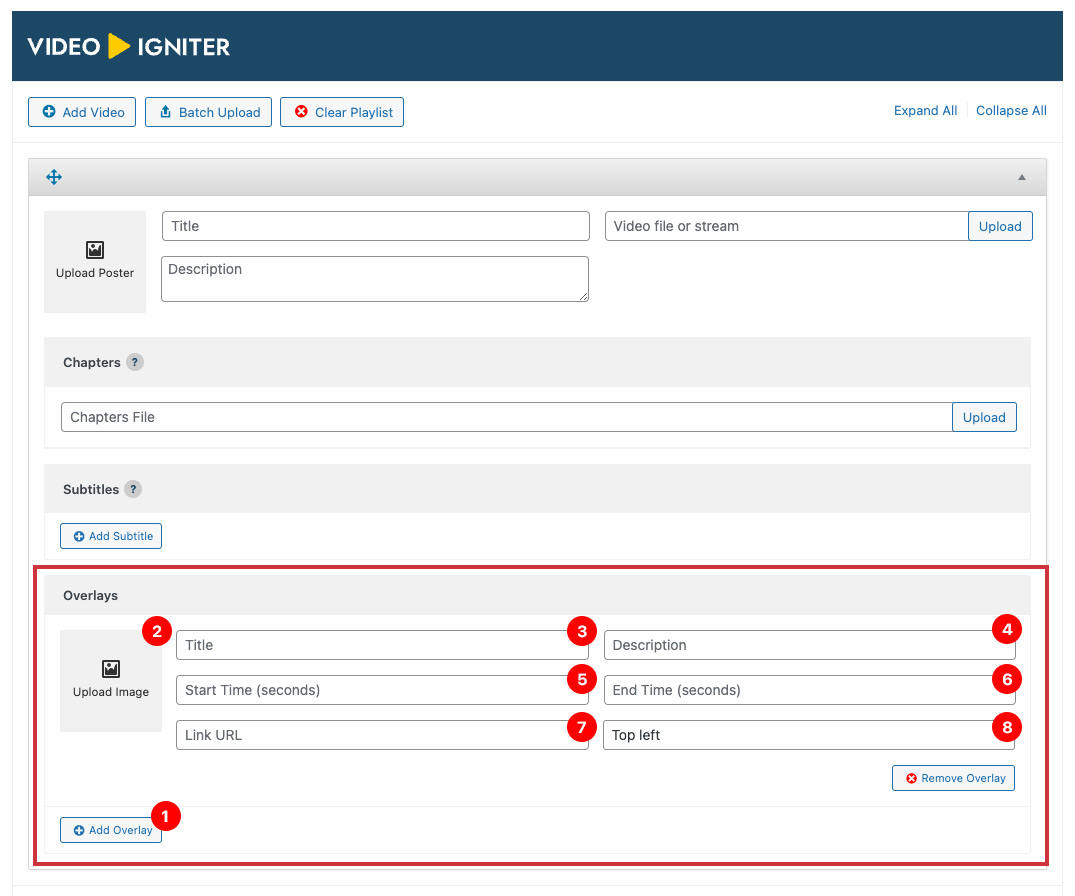
- Add Overlay: Start by clicking this button to add your first overlay. You can have multiple overlays for each video track.
- Upload Image: Optionally display an image within the overlay. It should be about 200px in width and appears to the left of the text content.
- Title: Set a title for the overlay.
- Description: Set a small description that will appear below the title.
- Start Time: Enter the exact second you want the particular overlay to show up.
- End Time: Enter the exact second you want the particular overlay to hide.
- Link URL: Optionally enter a URL you want this overlay to link to.
- Position: Select where the overlay should be positioned within the video player.
PRO Playlist Settings
The VideoIgniter PRO add-on adds additional settings on the playlist, let’s see them one by one:
- Playlist layout: Choose where the video thumbnails will appear (left, right, or bottom) when the playlist contains more than one video.
- Show fullscreen toggle: Whether to show the button that enables fullscreen viewing or not.
- Show playback speed controls: Whether to show playback speed controls on the player.
- Starting volume: Choose a volume that player should start with (0-100).
- (PRO) Sticky player on scroll: Enabling this option will make the player stick to the bottom right of the viewport when the user scrolls away from the video.
- (PRO): Enable hover preview: Start playing the video on mute immediately when the user hovers their mouse over the video.
- (PRO) Video skipping: Enable video skipping (forwards and backwards) controls on the player.
Internal taxonomy
With VideoIgniter PRO you can separate your playlists in categories that can help with organization and later retrieval. Please note this is an internal taxonomy, which means that you can’t use it to display all playlists of a certain category in a listing page on your site, like you would do for example with a post category. The taxonomy is here mainly for archiving purposes.
Premium Support
Along with these great extra features, VideoIgniter PRO comes with premium support via our dedicated support forum. Have any questions? Click here and we will help you right away!